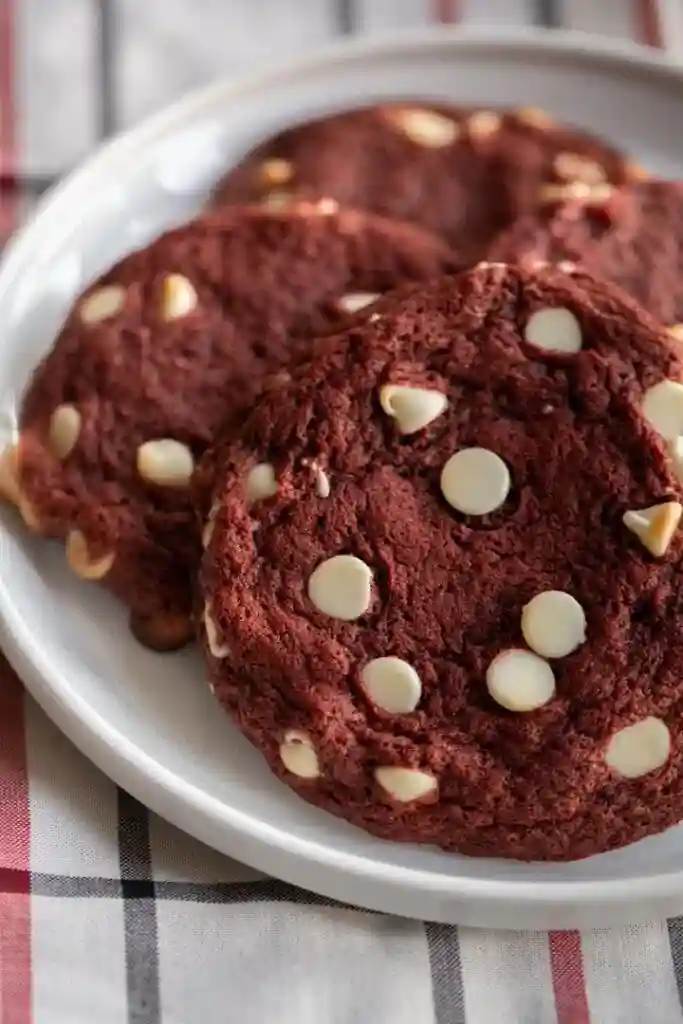
Red velvet cookies are the perfect treat for anyone who loves the rich, velvety texture and bold color of this classic cake flavor—now in cookie form.
These soft, chewy cookies are packed with that signature red hue and a slightly cocoa-flavored bite that makes them hard to resist.
What makes them even better? A handful of sweet white chocolate chips, adding the perfect touch of sweetness to every bite.
These cookies aren’t just for special occasions, but let’s be honest, they’re a fantastic option for Valentine’s Day or any time you want to show someone you care.
Whether you’re baking for yourself or someone special, these red velvet cookies are guaranteed to impress. With easy-to-find ingredients and simple steps, you’ll be enjoying a batch of these delicious cookies in no time!
Red Velvet Cookies Recipe
Ingredients
- 2 1/4 cups all-purpose flour (or gluten-free flour blend)
- 1 teaspoon baking soda
- 1 teaspoon salt
- 1/4 cup cocoa powder
- 1 cup unsalted butter (or dairy-free butter for vegan)
- 3/4 cup granulated sugar
- 3/4 cup brown sugar (or coconut sugar)
- 1 teaspoon vanilla extract
- 1 teaspoon red food coloring (or use beet juice for a natural red color)
- 2 large eggs (substitute with flax eggs for a vegan option)
- 2 cups white chocolate chips (or use dairy-free chips if vegan)
Instructions
- Start by preheating your oven to 350°F (175°C) and lining a baking sheet with parchment paper or using a silicone baking mat.
- In a small bowl, combine the flour, baking soda, salt, and cocoa powder.
- In a larger mixing bowl, beat together the softened butter, granulated sugar, brown sugar, vanilla extract, and red food coloring until smooth and fully blended. If you’re using a stand mixer, use the paddle attachment.
- Add the eggs one at a time, mixing well after each addition. For a vegan version, mix the flax eggs into the wet ingredients until they’re combined.
- Gradually stir in the dry ingredients (the flour mixture) until a thick dough forms.
- Gently fold in the white chocolate chips, ensuring they’re evenly distributed throughout the dough.
- Scoop out rounded tablespoons of dough and place them about 1 to 2 inches apart on the baking sheet. For larger cookies, roll the dough into ping-pong-sized balls.
- Chill the dough for about 20 minutes to prevent the cookies from spreading too much while baking.
- Bake in the preheated oven for 10-12 minutes. Let them cool on the baking sheet for 2 minutes before transferring them to a wire rack to cool completely.
Tips For Making Perfect Red Velvet Cookies
To ensure your red velvet cookies are soft, chewy, and full of flavor, here are some pro tips:
- Use Softened Butter: Make sure your butter is soft but not melted. This helps the dough mix better and gives the cookies a smoother texture.
- Don’t Skip the Chilling Step: Chilling your cookie dough for at least 20 minutes helps prevent the cookies from spreading too thin while baking. It also allows the flavors to set in.
- Incorporate the Food Coloring Carefully: If you’re using liquid food coloring, add it slowly and mix well. Too much food coloring can affect the texture of the dough, so stick to the recommended amount.
- Add White Chocolate Chips for Extra Sweetness: White chocolate chips add a lovely creamy sweetness that complements the tangy cocoa flavor. You can also try milk chocolate chips if you prefer.
- Check Your Oven Temperature: Oven temperatures can vary, so use an oven thermometer to ensure you’re baking at the right temperature. Slightly underbaking the cookies (a minute or two) keeps them soft and chewy.
How To Store Red Velvet Cookies?
After you’ve made these delicious cookies, you’ll want to keep them fresh for as long as possible. Here’s how to store your red velvet cookies so they stay soft and tasty:
- At Room Temperature: Store your cookies in an airtight container at room temperature for up to 5 days. This will keep them soft and chewy.
- In the Freezer: If you want to store them longer, place the cookies in a freezer-safe container or zip-top bag. They can be frozen for up to 3 months. To thaw, just leave them out at room temperature for a couple of hours or warm them up in the microwave for a few seconds.
- Separate Layers with Parchment Paper: If you’re stacking your cookies, place a piece of parchment paper between layers to prevent them from sticking together.
What Makes Red Velvet Taste So Good?
Red velvet has a unique taste that sets it apart from other cookies and cakes. It’s a combination of flavors and textures that people can’t resist. Here’s why red velvet tastes so amazing:
- Subtle Cocoa Flavor: Red velvet has a slight chocolate flavor from the cocoa powder used in the recipe. It’s not overly sweet, which lets the other flavors shine through.
- Tangy Buttermilk: Buttermilk gives red velvet its distinct tang. This tanginess balances out the sweetness, making each bite deliciously rich and not too sugary.
- Buttery Richness: The butter in the dough gives red velvet its soft, melt-in-your-mouth texture. The butter helps the cookies spread and become chewy on the inside.
- Sweet White Chocolate Chips: Adding white chocolate chips to red velvet cookies gives them an extra layer of sweetness that pairs perfectly with the slight cocoa flavor.
Why Cooling Cookie Dough Before Baking Is Important?
Cooling cookie dough before baking might seem like an extra step, but it actually plays a big role in how your cookies turn out. Here’s why it’s important:
- Prevents Over-Spread: Cooling the dough helps the fat (like butter) solidify, which means the cookies won’t spread too much when baked. If the dough is too warm, the cookies can flatten out too much and lose their soft, chewy texture.
- Helps Maintain Shape: When you chill cookie dough, the dough firms up, which helps the cookies hold their shape better while baking. This is especially helpful for cut-out cookies or cookies that need to stay thick and soft.
- Enhances Flavor: Chilling dough allows the flour to fully absorb the liquid, making the dough a little drier and more concentrated. This extra time also gives the ingredients time to mingle, improving the overall flavor of the cookies.
- Prevents Dough from Being Too Sticky: Cold dough is easier to handle. It won’t stick to your hands as much, and it’s less likely to get too messy when shaping or rolling.
You May Also Like To Check Out These Recipes
- Mardi Gras King Cake
- Strawberry Crunch Cupcakes
- Chocolate Peanut Butter Cupcakes
- Red Velvet Cake Pops
- Valentine’s Day Sugar Cookies
- Baby Shower Cookies
- Red Velvet Cinnamon Rolls
- Red Velvet Pancakes
- Red Velvet Cheesecake Brownies
- Red Velvet Cheesecake Swirl Brownies
- Valentine’s Day Vanilla Nougat Candy Bar Bites
- Valentine’s Day Mini Heart Mousse Cakes
- Breakfast Egg Muffins
- Egg In A Hole
- Galentines Day Dessert Charcuterie Board
- Pina Colada
- Sweetheart Valentine Cake
- Red Velvet Cake
- Conversation Heart Cookies
- Valentine’s Day Heart Pizza
- Cherry Cobbler
- Red Velvet Crinkle Cookies
- Gluten-Free Black Bean Brownies
- Non-Alcoholic Italian Cream Soda
- Non-Alcoholic Strawberry Margarita
- Non-Alcoholic Cranberry Shirley Temple
- Non-Alcoholic Pineapple Mocktail
- Chocolate Strawberry Cake
- Chocolate Raspberry Cake
- Strawberry Sugar Cookies
- Lemon Raspberry Cookies
- Strawberries And Cream Cake
- Marble Heart Sugar Cookies
- Red Velvet Peanut Butter Blossom Cookies
- Flourless Peanut Butter Chocolate Chunk Cookies
- Red Velvet Cake Mix Cookies
- Pink Ombre Cake
- Strawberry Cake Mix Cookies
- Strawberry Crunch Cookies
- Strawberry Shortcake Cookies
- Disneyland Raspberry White Chocolate Cookies
- Raspberry Cheesecake Cookies
- Heart Shaped Decorated Cookies
- Chocolate Cherry Cake
- Roasted Strawberry Cheesecake
- Pink Heart Shaped Cake With Strawberry Cream Cheese Frosting
- Chocolate Covered Strawberry Cake
- Beet Hummus
- Chocolate Chip Gooey Butter Cake
- Chocolate Raspberry Cupcakes From Cake Mix