When I first saw kids laugh at cupcakes with marshmallow skeleton heads sitting proudly on top, I knew these treats were more than just baked goods—they were pure fun on a plate.
Skeleton Halloween cupcakes have a playful charm that instantly makes people smile.
They’re the cupcakes everyone notices on the table, not because they’re complicated, but because they’re full of character.
A fluffy swirl of frosting, a marshmallow grinning with a hand-drawn face, and little pretzel arms sticking out like it’s ready to dance—each detail makes them feel alive in a way ordinary desserts don’t.
What I love most about these cupcakes is how they can light up a party without needing anything extra.
Kids love helping decorate the skeleton heads, adults secretly enjoy the silly details, and the end result is always laughter mixed with a bit of awe.
They don’t just sit quietly on the dessert table; they grab attention, spark conversations, and become part of the fun.
Baking them feels like building characters out of frosting and marshmallows, and that playful energy is what makes them unforgettable.
Table of Contents
Skeleton Halloween Cupcakes Recipe
Ingredients
For The Cupcakes
- 1 ½ cups all-purpose flour
- 1 ½ tsp baking powder
- ¼ tsp baking soda
- ¼ tsp salt
- ½ cup unsalted butter, softened
- ¾ cup granulated sugar
- 2 large eggs, room temperature
- 2 tsp vanilla extract
- ½ cup whole milk, room temperature
For The Frosting
- 1 cup unsalted butter, softened
- 3 cups powdered sugar, sifted
- 2 tbsp heavy cream or milk
- 1 tsp vanilla extract
- Red or pink gel food coloring
For Decoration
- Large marshmallows
- Black edible marker or black gel icing
- Mini pretzel sticks (for arms)
- Sprinkles in assorted colors
Instructions
- Preheat the oven to 350°F (175°C) and line a muffin pan with 12 cupcake liners.
- In a bowl, whisk together flour, baking powder, baking soda, and salt. Set aside.
- In a separate large bowl, beat butter and sugar until light and fluffy. Add eggs one at a time, mixing well after each. Stir in vanilla extract.
- Add dry ingredients gradually, alternating with milk, beginning and ending with the dry mixture. Mix just until combined.
- Divide the batter evenly into the cupcake liners, filling each about two-thirds full. Bake for 18–20 minutes or until a toothpick inserted in the center comes out clean. Allow to cool completely on a wire rack.
- For the frosting, beat butter until creamy. Slowly add powdered sugar, mixing on low. Add cream and vanilla, then beat on high until fluffy. Tint with food coloring to your desired shade.
- Transfer frosting to a piping bag fitted with a star tip and swirl generously on cooled cupcakes.
- To make the skeleton heads, draw or pipe eyes, nose, and a mouth onto each marshmallow using black edible marker or gel icing. Let set.
- Insert two mini pretzel sticks into the sides of each marshmallow for arms.
- Place the decorated marshmallow skeleton heads on top of each frosted cupcake.
- Sprinkle colorful sprinkles over the frosting for a festive finish.

How Do I Make The Skeleton Heads Stay Firm On Cupcakes?
The marshmallow skeleton heads are the highlight of these cupcakes, so keeping them steady is important.
- Use fresh marshmallows: Older marshmallows lose their shape and may collapse, so always start with fresh ones.
- Anchor with frosting: Press the marshmallow slightly into the frosting so it grips well and doesn’t wobble.
- Support with pretzels: The mini pretzel arms act like extra support, helping the marshmallow stay upright.
- Decorate once cooled: Only add the marshmallow skeletons after cupcakes are completely cool, otherwise the heat can melt the design.
Can I Make Skeleton Halloween Cupcakes Ahead Of Time?
Yes, these cupcakes can be made in advance, but timing matters to keep them fresh and looking good.
- Bake the cupcakes a day earlier: Store them covered at room temperature, then frost and decorate the next day.
- Frosting can be prepared early: Whip the frosting ahead and store it in the fridge. Bring it back to room temperature and re-whip before piping.
- Decorations should be last: The skeleton heads are best added on the same day you plan to serve, so they stay neat and don’t lose shape.
How Should I Store Skeleton Halloween Cupcakes?
Storage plays a big role in keeping these cupcakes moist and the decorations intact.
- Room temperature: If serving within 1–2 days, store them in an airtight container at room temperature away from heat.
- Refrigeration: For longer storage up to 4 days, refrigerate them in a sealed container. Allow to come back to room temperature before serving for the best taste.
- Freezing cupcakes (without decorations): Bake and freeze plain cupcakes in airtight containers for up to 2 months. Thaw at room temperature, then frost and decorate when needed.
Can I Use Different Frosting Colors For Skeleton Halloween Cupcakes?
Changing frosting colors adds even more fun to these cupcakes.
- Orange frosting: Fits the Halloween theme perfectly and looks great with marshmallow skeletons.
- Purple or green frosting: Creates a bold, playful look that kids love.
- Classic white frosting: Makes the skeleton heads stand out even more, especially with colorful sprinkles.
What If I Don’t Have An Edible Marker For The Skeleton Faces?
You can still make skeleton faces without a marker by using other simple options.
- Black gel icing: Pipe small dots and lines for eyes, nose, and mouth.
- Melted chocolate: Use a fine-tip piping bag or toothpick to carefully draw the face.
- Fondant cutouts: Tiny fondant shapes can be pressed onto marshmallows for a neat skeleton look.
How Long Do Skeleton Halloween Cupcakes Stay Fresh?
Cupcakes can stay tasty and safe to eat for several days if stored properly.
- At room temperature: They stay soft and fresh for up to 2 days in an airtight container.
- In the fridge: Cupcakes last up to 4 days, though the fridge can make them slightly firm. Bring them to room temperature before serving.
- Frozen (without skeletons): Store for 1–2 months and decorate only after thawing to keep the marshmallows and pretzels fresh.
Can Kids Help In Making Skeleton Halloween Cupcakes?
Yes, this recipe is great for involving kids because it feels like a fun craft activity.
- Drawing faces: Kids love creating funny or scary skeleton expressions on marshmallows.
- Adding sprinkles: Let children handle the sprinkle decoration for extra fun.
- Placing arms: Pretzel sticks are easy for little hands to insert into marshmallows.
Why Did My Frosting Turn Out Runny?
Frosting can sometimes lose its shape and become runny, but there are easy ways to fix it.
- Too much liquid added: If you added extra milk or cream, the frosting will loosen. Add more powdered sugar, little by little, until it firms up.
- Butter too soft: Overly soft or melted butter can make frosting sloppy. Chill the frosting in the fridge for 15 minutes, then whip again.
- Warm environment: If your kitchen is hot, frosting may soften quickly. Keep it cool while decorating, or refrigerate it between batches.
Why Did My Cupcakes Sink In The Middle?
Cupcakes that sink in the center usually mean the batter or baking process went slightly wrong.
- Overmixing batter: This adds too much air, which later collapses. Mix only until ingredients combine.
- Wrong oven temperature: If the oven is too hot or too cool, cupcakes may not rise properly. Always preheat and use an oven thermometer if needed.
- Opening the oven door too soon: Sudden changes in temperature can deflate the cupcakes, so wait until at least 15 minutes into baking before checking.
Why Did My Skeleton Heads Fall Off The Cupcakes?
Marshmallow skeletons need proper support to stay upright on frosting.
- Not anchored well: Press the marshmallow slightly into the frosting so it sticks firmly.
- Frosting too soft: If frosting is runny, the marshmallow won’t hold. Make sure the frosting is firm before placing skeletons.
- Heavy decoration on top: If the face details are too thick with icing or chocolate, they may weigh down the marshmallow. Keep designs light and neat.
Why Did My Cupcakes Turn Out Dry?
Dry cupcakes can take away from the fun, but the cause is usually simple.
- Overbaking: Extra minutes in the oven can dry out the cake. Always check a few minutes before the suggested baking time.
- Too much flour: Adding extra flour makes the batter heavy. Use proper measuring cups and level them off.
- Storing uncovered: If cupcakes are left exposed, they lose moisture quickly. Keep them sealed in an airtight container.
Why Did My Sprinkles Bleed Into The Frosting?
Sometimes colorful sprinkles can melt into frosting and create streaks.
- Moist frosting surface: If the frosting is very soft, sprinkles may bleed. Let the frosting set for a few minutes before adding them.
- Type of sprinkles used: Some cheaper brands tend to melt faster. Use high-quality sprinkles for better results.
- Humidity in the air: In very humid weather, sprinkles soften quickly. Store finished cupcakes in a cool, dry place.
You May Also Like To Check Out These Recipes
- Halloween Veggie Tray
- 11 Halloween Sugar Cookies Decorating Ideas
- 150 Fun Halloween Food Ideas
- Halloween Deviled Eggs
- Halloween Brownies
- 75 Easy Halloween Treats
- 75 Best Halloween Appetizers
- Cheeseburger Soup
- Halloween Cheese Dip
- Halloween Oreos
- 60 Halloween Drinks For Kids And Adults
- Halloween Dirt Cake
- Halloween Taco Dip
- Halloween Pretzels
- Halloween Pasta Salad
- Pumpkin Whoopie Pies
- Halloween Spiderweb Pancakes
- 30 Amazing Halloween Side Dishes
- Halloween Witch Hat Cupcakes
- Halloween Melted Witch Cake
- Halloween Cookie Cake
- Halloween Chocolate Covered Strawberries
- Halloween Cake Pops
- 15 Spooky Halloween Pizza Ideas
- 50 Halloween Potluck Ideas
- 50 Halloween Finger Food Ideas
- 50 Halloween Dessert Ideas
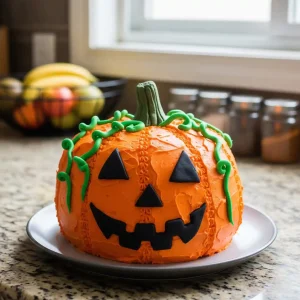
- Jack-O’-Lantern Halloween Pumpkin Cake
- Fall And Halloween Coffee Bar: Setup And Decoration Ideas
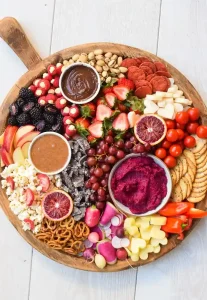
- Halloween Charcuterie Board
- Spooky Halloween Fruit Platter
- Halloween Chocolate Bark
- Halloween Cookie Cake
- Halloween Dirt Cake
- Halloween Eyeball Pizza
- Halloween Cake Pops
- Halloween Chocolate Covered Strawberries
- Halloween Ghost Pizza
- Halloween Melted Witch Cake
- Halloween Mini Mummy Pizzas
- Best Orange Cake
- Halloween Brownies
- Halloween Vegan Spider Pizza Bites
- 7 Layer Halloween Taco Dip
- Halloween Brownies
- Halloween Ghost Cookies
- Halloween Cheese Dip
- Halloween Deviled Eggs
- Halloween Oreos
- Halloween Rice Krispie Treats
- Halloween Deviled Eggs
- 75 Easy Halloween Treats
- 75 Best Halloween Appetizers
- 150 Fun Halloween Food Ideas
- 60 Halloween Drinks For Kids And Adults
- 30 Amazing Halloween Side Dishes
- Halloween Witch Hat Cupcakes
- 15 Spooky Halloween Pizza Ideas
- 50 Halloween Dessert Ideas
- Halloween Snack Mix
- Halloween Popcorn Balls
- 50 Halloween Potluck Ideas
- 50 Halloween Finger Food Ideas
- Fall And Halloween Coffee Bar: Setup And Decoration Ideas
- Halloween Dirt Cups
- Halloween Mummy Wrap Cookies
- Halloween Pasta Salad
- Halloween Frankenstein Cookies
- Halloween Popcorn Balls
- Halloween Pumpkin Face Cookies
- Halloween Rice Krispie Treats
- Halloween Spiderweb Pancakes
- Halloween Spiderweb Cookies
- Halloween Vampire Teeth Cookies
- Halloween Witch Hat Cupcakes
- Halloween Bat Cookies