I’ll be honest — a roast turkey feels incomplete without a good gravy. It’s not just a sauce; it’s what ties the whole meal together.
That smooth, rich, golden liquid you pour over slices of turkey and mashed potatoes? That’s the part everyone remembers.
I still remember the first time I made it from scratch — I was nervous, standing over the stove, whisk in hand, hoping it wouldn’t turn into a lumpy mess.
But once I understood how butter, flour, and broth come together, it became one of the easiest and most rewarding parts of the meal.
The beauty of turkey gravy is how simple ingredients create something so full of flavor. You don’t need fancy tricks or complicated steps — just patience and a steady whisk.
When those turkey drippings mix with a little butter and flour, the kitchen fills with a deep, savory aroma that instantly feels like home.
And when the gravy starts to thicken and turn glossy, that’s when you know it’s perfect.
This recipe gives you that same warm, velvety gravy — thick enough to coat a spoon but smooth enough to pour easily. It clings beautifully to turkey, potatoes, and even a bite of stuffing.
Every detail below matters: how long to cook the roux, when to add the stock, how to season it just right. Follow along carefully, and you’ll end up with gravy so good that people will ask for extra.
Now, let’s make that golden sauce that turns an ordinary turkey dinner into something unforgettable.
Turkey Gravy Recipe
Ingredients
- 4 tablespoons unsalted butter
- 1/4 cup all-purpose flour
- 2 cups turkey drippings (from roasted turkey, strained)
- 1 cup low-sodium chicken broth or turkey stock (warm)
- 1 teaspoon finely chopped fresh thyme (plus extra for garnish)
- 1 teaspoon finely chopped fresh rosemary
- 1/2 teaspoon garlic powder
- 1/4 teaspoon onion powder
- 1/2 teaspoon freshly ground black pepper
- 1/2 teaspoon fine sea salt (adjust to taste)
- Optional: a few drops of lemon juice for balance
Instructions
- After roasting your turkey, pour all the pan drippings into a heatproof measuring cup or bowl. Let them sit for a few minutes until the fat rises to the top.
- Skim off and discard most of the fat, leaving about 1–2 tablespoons for flavor. Strain the remaining liquid through a fine mesh sieve to remove any bits. Set aside.
- In a medium saucepan, melt the butter over medium heat. Once melted, sprinkle in the flour. Whisk constantly for about 3–4 minutes until the mixture becomes smooth, thick, and lightly golden brown. This step builds the base flavor and gives your gravy a deep, rich color.
- Slowly pour in the warm turkey drippings while whisking continuously to prevent lumps. Once the mixture thickens slightly, gradually whisk in the chicken broth or turkey stock. Keep stirring until smooth and well combined.
- Add the thyme, rosemary, garlic powder, onion powder, black pepper, and salt. Reduce the heat to low and let the gravy simmer for 8–10 minutes, whisking occasionally, until it reaches a silky, pourable consistency.
- Taste the gravy and adjust seasoning if needed. If it tastes a bit heavy, stir in a few drops of lemon juice to brighten the flavor.
- Once the gravy is thick and glossy, remove it from the heat. Strain it through a fine mesh sieve again for the smoothest texture.
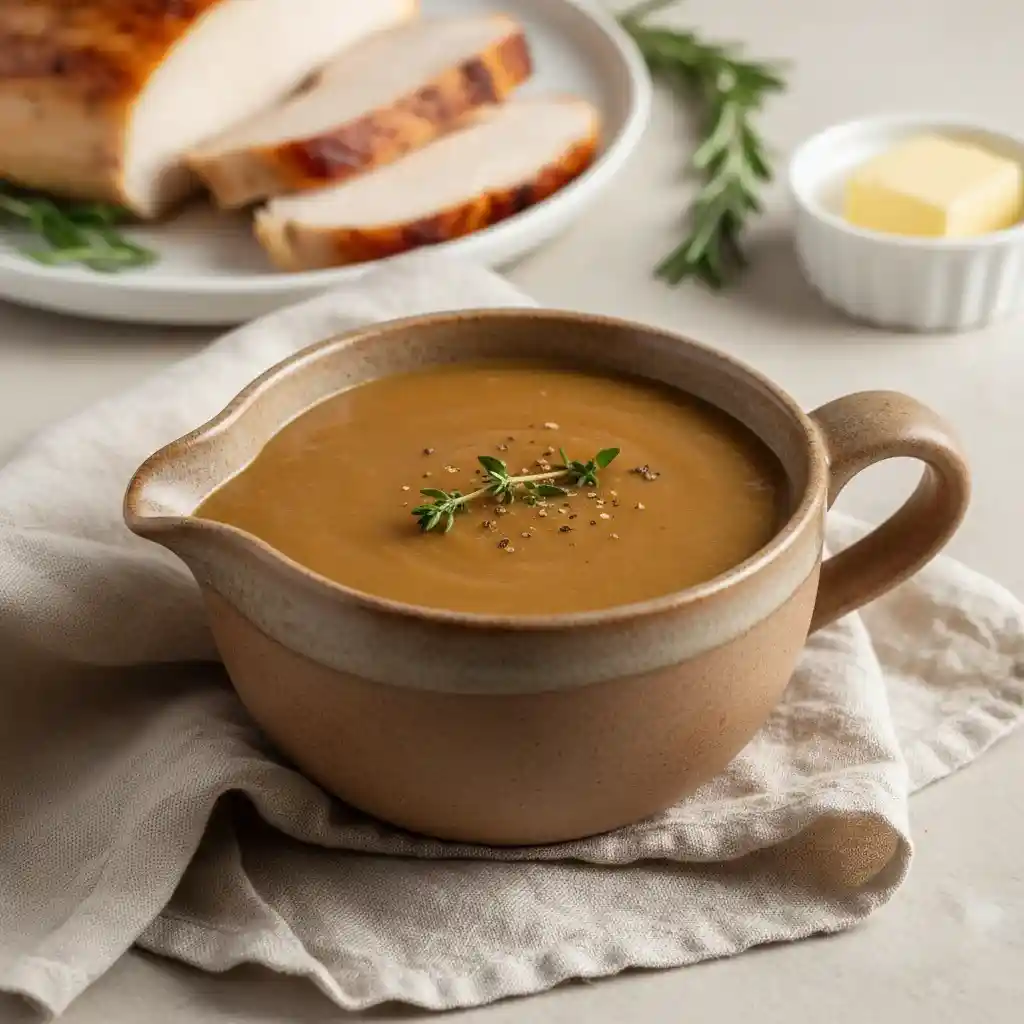
- Pour the hot gravy into a serving jug or sauce boat. Garnish with a small sprig of thyme and a light sprinkle of freshly ground black pepper for a polished presentation.
Tips for the Perfect Result
- Whisk continuously when adding flour and liquid to avoid lumps.
- Warm broth prevents the gravy from seizing up or becoming grainy.
- For extra richness, whisk in a small cube of butter right before serving.
- If the gravy becomes too thick, thin it with a splash of warm broth.
How Do You Make Turkey Gravy From Scratch Using Drippings?
Making gravy from drippings gives it the richest taste and color. The key is balancing butter, flour, and broth while using the flavorful liquid left from the turkey pan.
- Use fresh drippings: After roasting, pour the drippings into a bowl and let the fat rise to the top. Skim off extra fat but keep about 1–2 tablespoons for flavor.
- Create a smooth roux: Melt butter in a saucepan, add flour, and whisk for 3–4 minutes until golden and fragrant.
- Add warm liquid slowly: Gradually whisk in turkey drippings and broth to avoid lumps.
- Simmer and season: Cook until thickened, then add salt, pepper, and herbs like thyme or rosemary.
- Strain for smoothness: Use a fine mesh sieve for a velvety, glossy finish.
What’s The Secret To Getting Smooth And Lump-Free Turkey Gravy?
A silky gravy depends on timing and temperature. The secret is constant whisking and slow liquid addition.
- Warm liquid only: Always add warm broth or drippings, never cold.
- Whisk constantly: Keep whisking while adding liquid — this breaks lumps before they form.
- Avoid rushing: Add liquid in small portions, letting the flour absorb it before adding more.
- Strain if needed: If lumps appear, strain the gravy before serving.
- Use the right ratio: Equal parts butter and flour help maintain balance.
How Do You Fix Turkey Gravy That’s Too Thin Or Too Thick?
Gravy texture can change quickly, but it’s easy to adjust with the right technique.
- Too thin: Whisk 1 tablespoon flour or cornstarch with cold water and slowly stir it into simmering gravy.
- Too thick: Add warm broth or water a few tablespoons at a time until it loosens.
- Keep stirring: Continuous whisking prevents separation.
- Simmer again: Let it cook for a minute or two so the texture blends smoothly.
- Taste test: Adjust seasoning after fixing consistency.
Can You Make Turkey Gravy Ahead Of Time And Reheat It?
Yes, you can prepare it in advance — it actually deepens in flavor after resting.
- Cool properly: Let gravy cool completely before storing.
- Store in airtight container: Keep in the fridge for up to 3 days.
- Reheat slowly: Warm on low heat, whisking often until smooth.
- Add liquid if thick: Stir in a splash of broth to bring it back to the right consistency.
- Finish fresh: Add a small cube of butter before serving for shine.
How Do You Make Turkey Gravy Without Drippings?
If you don’t have drippings, you can still make delicious gravy using a few pantry items.
- Use butter as base: Melt butter and whisk in flour to make a golden roux.
- Add flavorful stock: Use turkey or chicken stock instead of drippings.
- Boost flavor: Add garlic powder, onion powder, thyme, and pepper.
- Simmer well: Cook for 8–10 minutes to thicken and deepen taste.
- Optional touch: Stir in a spoon of cream for smooth texture.
Why Did My Turkey Gravy Turn Out Greasy Or Separate?
Greasy gravy happens when there’s too much fat or not enough thickener.
- Skim the fat: Always remove excess fat from drippings before making gravy.
- Right ratio matters: Use equal parts butter and flour for balance.
- Simmer gently: Boiling can make the fat separate from the liquid.
- Whisk until smooth: Consistent whisking blends fat evenly.
- If it separates: Add a few drops of warm broth and whisk again until creamy.
What’s The Best Way To Thicken Turkey Gravy Naturally?
Thickening gravy naturally keeps the texture smooth and flavor pure.
- Make a proper roux: Butter and flour cooked together form a natural thickener.
- Use reduction: Simmer gravy longer to let it thicken as moisture evaporates.
- Add mashed potato or starch water: A small spoon can add body naturally.
- Don’t overdo flour: Too much makes it heavy and pasty.
- Keep whisking: This ensures a consistent texture throughout.
What Kind Of Stock Or Broth Makes The Best Turkey Gravy?
The broth adds the base flavor — choose rich and well-seasoned stock for the best results.
- Turkey stock: Deep flavor and the most authentic option.
- Chicken stock: Light, yet flavorful — a great backup choice.
- Vegetable stock: Good for a lighter taste with gentle herbal notes.
- Homemade broth: Always richer than store-bought options.
- Warm stock only: Prevents lumps and keeps gravy silky.
Do I Need To Strain Turkey Gravy Before Serving?
Straining helps you achieve that restaurant-style smoothness.
- Removes lumps: Any small flour bits or herbs get filtered out.
- Improves texture: Makes the gravy velvety and glossy.
- Use fine mesh sieve: Press gently with a spoon to extract every bit.
- Best done warm: Strain while gravy is hot for easy flow.
- Optional garnish: Add a sprinkle of pepper or fresh thyme after straining.
How Do I Fix Gravy That Tastes Too Salty Or Bland?
Seasoning makes or breaks gravy, but fixing it is simple.
- Too salty: Add unsalted broth, mashed potato, or a splash of cream to tone it down.
- Too bland: Stir in a little black pepper, garlic powder, or herbs for flavor.
- Taste after simmering: Flavors develop as gravy thickens.
- Avoid extra salt early: Always taste before adding more.
- Add a drop of lemon juice: It balances overly salty or heavy flavors.
Can You Freeze Turkey Gravy For Later Use?
Yes, gravy freezes well and keeps its flavor if stored correctly.
- Cool completely: Never freeze hot gravy — let it reach room temperature first.
- Use freezer-safe containers: Leave a little space on top for expansion.
- Label and date: Helps you use it within 3 months.
- Thaw overnight: Defrost in the fridge for best texture.
- Reheat slowly: Warm on low heat and whisk until smooth again.
You May Also Like To Check Out These Recipes
- Pumpkin Cream Cheese Swirl Muffins
- Mexican Street Corn White Chicken Chili
- Viral Tiktok Cucumber Salad
- Lasagna Soup Recipe
- Vegan Potato Soup
- Baked Cheesy Pumpkin Gnocchi
- Cheeseburger Soup
- Roasted Pumpkin Seeds
- Stuffed Acorn Squash
- Garlic Soup
- Broccoli Cheddar Soup
- 25 Butternut Squash Soup Recipes
- 50 Easy Soup Recipes
- Oven Roasted Sweet Potatoes Wedges
- Roasted Sweet Potato Black Bean Bowl
- Pumpkin Soup
- Hatch Chile Chicken Enchiladas
- Hatch Chile Corn Chowder
- Hatch Chile Cream Cheese Dip
- Hatch Green Chile Queso Dip
- Tomato Soup With Fresh Tomatoes
- Marry Me Chicken
- Grilled Hot Honey Chicken
- Chicken Broccoli Casserole
- Skillet Lemon Herb Chicken Breasts
- Healthy Chicken Spaghetti
- Cheesy Chicken Quesadillas
- Chicken and Asparagus Stir Fry
- Chicken Parmesan
- Buffalo Chicken Dip
- Chicken And Dumplings
- Crockpot Butter Chicken
- Creamy Cajun Chicken Pasta
- Chicken Tortilla Soup
- Creamy Sausage Potato Soup
- Roasted Butternut Squash Soup
- Cheeseburger Soup
- Roast Turkey