You need these brownies because they do the impossible: they deliver bakery-level fudginess with a lighter feel, without sacrificing that deep, chocolate-first indulgence everyone craves.
This is the perfect anytime dessert—weeknight treat, lunchbox surprise, or last-minute crowd-pleaser—made smarter thanks to one quiet hero ingredient that transforms the texture.
Greek yogurt steps in to create richness without heaviness, giving you brownies that feel satisfying yet balanced. Zero guilt, zero stress, and total confidence when you set the pan on the table.
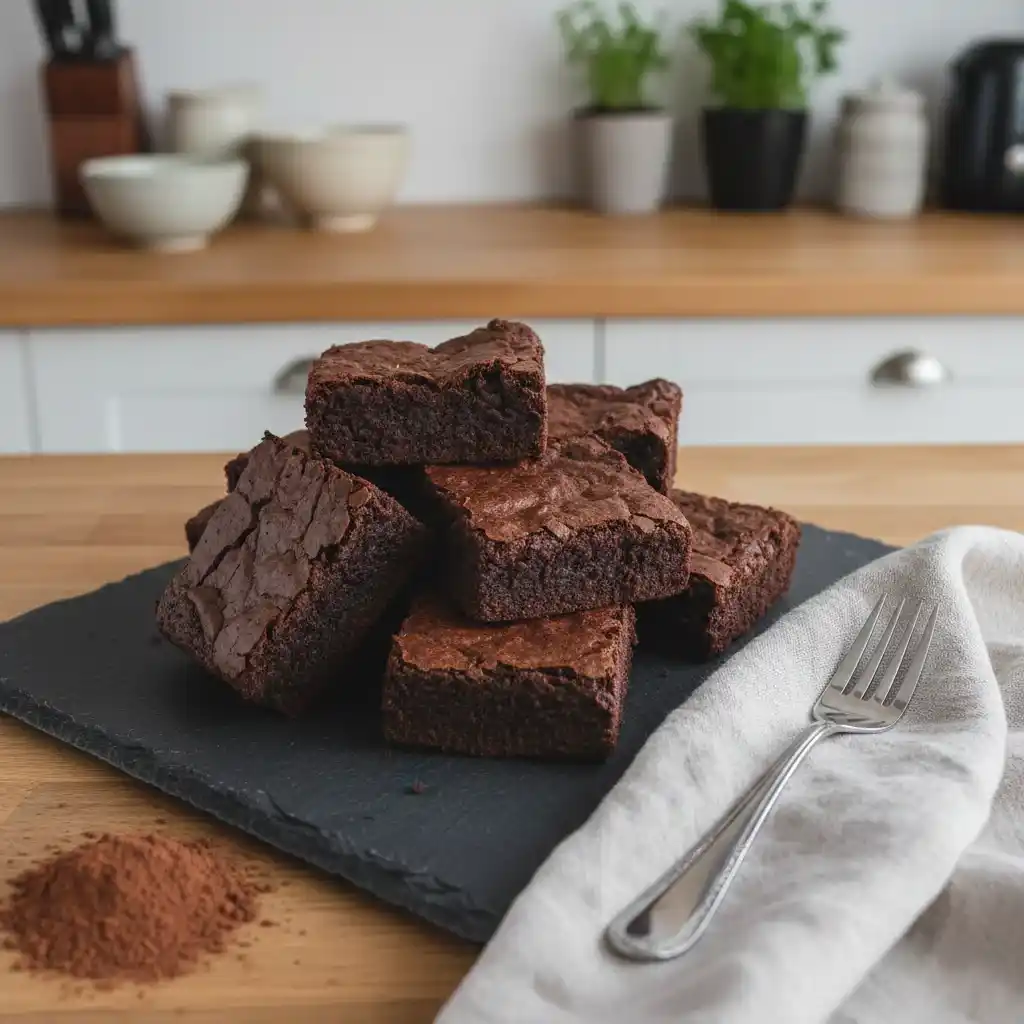
Sink your teeth in and you’ll notice the experience immediately. The top has that delicate, crackly sheen that shatters just enough before giving way to a dense, melt-in-your-mouth center.
The flavor hits with bold cocoa intensity and smooth chocolate depth, followed by a subtle tang that keeps each bite from feeling cloying. Think ultra-fudgy, slightly chewy edges with a moist, almost truffle-like middle.
Cocoa powder and melted chocolate do the heavy lifting here, while Greek yogurt quietly elevates everything, making these brownies irresistibly soft and rich.
You’re about to make a dessert that looks impressive, tastes indulgent, and comes together with minimal effort. This recipe is straightforward, forgiving, and ready in under an hour.
Serve them plain, dusted lightly with cocoa, or topped with berries. By the end, you’ll have a brownie recipe that feels modern, reliable, and destined to become your go-to chocolate fix.
Table of Contents
Greek Yogurt Brownies Recipe
Ingredients
- 170 g unsalted butter
- 170 g dark chocolate, finely chopped
- 200 g granulated sugar
- 100 g light brown sugar
- 2 large eggs, room temperature
- 120 g plain Greek yogurt, full-fat preferred
- 1 teaspoon vanilla extract
- 75 g unsweetened cocoa powder
- 100 g all-purpose flour
- ½ teaspoon fine salt
- ½ teaspoon baking powder
Instructions
- Preheat your oven to 170°C. Line an 8-inch square baking pan with parchment paper, leaving an overhang on two sides for easy lifting later. Lightly grease the exposed sides.
- In a heatproof bowl, combine the butter and chopped dark chocolate. Melt gently over a saucepan of barely simmering water, stirring until smooth and glossy. Remove from heat and let cool for 3 to 4 minutes.
- Whisk the granulated sugar and brown sugar into the melted chocolate mixture until fully dissolved and slightly thickened.
- Add the eggs one at a time, whisking well after each addition. The batter should look shiny and elastic at this stage.
- Stir in the Greek yogurt and vanilla extract until fully incorporated. The mixture will become lighter in color and silkier in texture.
- In a separate bowl, sift together the cocoa powder, flour, salt, and baking powder. This step prevents lumps and ensures even distribution.
- Fold the dry ingredients into the wet mixture using a spatula. Mix gently just until no dry streaks remain. Do not overmix; the batter should be thick and glossy.
- Pour the batter into the prepared pan and smooth the top evenly into the corners.
- Bake for 25 to 30 minutes, or until the edges are set and a toothpick inserted into the center comes out with moist crumbs, not wet batter.
- Remove from the oven and let the brownies cool completely in the pan. This resting time is essential for achieving the perfect fudgy texture.
- Lift out using the parchment overhang, slice into squares, and serve.
What Do Greek Yogurt Brownies Taste Like?
Greek yogurt brownies taste rich, chocolatey, and deeply satisfying, not tangy or sour. When baked, the yogurt melts seamlessly into the batter and acts like a moisture booster rather than a flavor star. You can expect:
- A strong chocolate flavor from cocoa and melted chocolate.
- A balanced sweetness that does not feel heavy or sugary.
- A soft, fudgy center with slightly chewy edges.
The Greek yogurt works behind the scenes. You will not taste it directly, but you will absolutely notice how moist and smooth the brownies feel when you bite into them.
Why Use Greek Yogurt In Brownies?
Greek yogurt replaces part of the fat while keeping the brownies moist and tender. It is thicker than regular yogurt, which makes it perfect for baking. Here is what it does for you:
- Moisture control: it keeps brownies soft without making them greasy.
- Texture improvement: it creates a dense, fudgy crumb instead of a dry or cakey one.
- Flavor balance: it gently cuts through intense chocolate richness so each bite feels lighter.
If you want brownies that feel indulgent but not overwhelming, Greek yogurt is the secret.
Can I Use Regular Yogurt Instead Of Greek Yogurt?
You can, but you will need to adjust it slightly to get the same result. Regular yogurt has more liquid, which can make the brownies too soft or gummy. If Greek yogurt is not available, do this:
- Strain the yogurt: place it in a fine strainer or cloth and let excess liquid drip out for 15 to 20 minutes.
- Use plain yogurt only: flavored yogurts will change the taste and sweetness.
Greek yogurt is still the best option because it gives you consistent texture and structure.
Are Greek Yogurt Brownies Fudgy Or Cakey?
These brownies are fudgy, not cakey. The recipe is designed to keep the flour low and the moisture high, which is exactly what fudgy brownies need. You will notice:
- A dense center that feels almost truffle-like.
- A thin, crackly top layer.
- Minimal crumb when you cut into them.
If you prefer extremely fudgy brownies, slightly underbake them by one or two minutes and let them cool completely before slicing.
How Do I Know When Greek Yogurt Brownies Are Done Baking?
Greek yogurt brownies should look set around the edges but slightly soft in the center when they are ready. Use these simple checks:
- Visual check: the top looks dry and slightly cracked, not shiny.
- Toothpick test: insert it into the center and look for moist crumbs, not wet batter.
- Touch test: gently press the center and feel light resistance, not liquid movement.
They continue to cook as they cool, so taking them out at the right moment is key.
Can I Make Greek Yogurt Brownies Ahead Of Time?
Yes, these brownies are excellent for making ahead because their texture actually improves after resting. Here is how to plan ahead:
- Same day baking: bake them in the morning and let them cool fully before serving.
- Next day serving: store them covered at room temperature and slice when needed.
- Flavor development: the chocolate flavor deepens after several hours of resting.
If you need stress-free dessert prep, this recipe works perfectly.
How Should I Store Greek Yogurt Brownies?
Proper storage keeps the brownies moist and fresh. Use one of these methods depending on how soon you will eat them:
- Room temperature: store in an airtight container for up to 2 days.
- Refrigerator: store in a sealed container for up to 5 days if your kitchen is warm.
- Layer protection: place parchment paper between stacked brownies to prevent sticking.
Always let the brownies cool completely before storing to avoid condensation.
Can You Freeze Greek Yogurt Brownies?
Yes, Greek yogurt brownies freeze very well and keep their texture when thawed correctly. For best results:
- Whole slab: wrap tightly in plastic wrap, then foil, and freeze for up to 2 months.
- Individual slices: wrap each piece separately so you can thaw only what you need.
- Thawing: let them sit at room temperature for about 30 minutes before eating.
Freezing is ideal if you want ready-to-go treats without baking again.
Can I Reduce The Sugar In Greek Yogurt Brownies?
You can reduce the sugar slightly, but not too much, or the texture will suffer. Sugar helps with moisture, structure, and that shiny brownie top. If you want to adjust:
- Reduce by small amounts: cutting up to 15 percent is usually safe.
- Avoid liquid sweeteners: they can make the batter too wet.
- Expect changes: less sugar means a less crackly top and slightly firmer texture.
For the best balance, stick close to the original measurements.
Why Did My Greek Yogurt Brownies Turn Out Dry?
Dry brownies usually come from baking or measuring issues, not the yogurt itself. Common reasons include:
- Overbaking: even a few extra minutes can dry them out.
- Too much flour: packing flour into the cup adds excess dryness.
- Low-fat yogurt: using very low-fat yogurt can reduce moisture.
Always measure carefully and remove brownies as soon as the center is just set.

Greek Yogurt Brownies
Ingredients
Method
- Preheat your oven to 170°C. Line an 8-inch square baking pan with parchment paper, leaving an overhang on two sides for easy lifting later. Lightly grease the exposed sides.
- In a heatproof bowl, combine the butter and chopped dark chocolate. Melt gently over a saucepan of barely simmering water, stirring until smooth and glossy. Remove from heat and let cool for 3 to 4 minutes.
- Whisk the granulated sugar and brown sugar into the melted chocolate mixture until fully dissolved and slightly thickened.
- Add the eggs one at a time, whisking well after each addition. The batter should look shiny and elastic at this stage.
- Stir in the Greek yogurt and vanilla extract until fully incorporated. The mixture will become lighter in color and silkier in texture.
- In a separate bowl, sift together the cocoa powder, flour, salt, and baking powder. This step prevents lumps and ensures even distribution.
- Fold the dry ingredients into the wet mixture using a spatula. Mix gently just until no dry streaks remain. Do not overmix; the batter should be thick and glossy.
- Pour the batter into the prepared pan and smooth the top evenly into the corners.
- Bake for 25 to 30 minutes, or until the edges are set and a toothpick inserted into the center comes out with moist crumbs, not wet batter.
- Remove from the oven and let the brownies cool completely in the pan. This resting time is essential for achieving the perfect fudgy texture.
- Lift out using the parchment overhang, slice into squares, and serve.
You May Also Like To Check Out These Recipes
- No-Bake Chocolate Date Cookies
- Strawberry Shortcake
- Blueberry Dump Cake
- Atlantic Beach Pie
- Angel Food Cake
- Blue Velvet Cake
- Super Moist Chocolate Zucchini Cake
- Chocolate Tres Leches Cake
- Blueberry Cobbler
- Funfetti Cupcakes
- Chocolate Raspberry Cake
- Homemade Blueberry Crisp
- No Bake Blueberry Cheesecake
- Ice Cream Cone Cupcakes
- Pineapple Juice Cake
- Mango Cake With Whipped Cream
- Raspberry Cake
- Bakery-Style Lemon Bars
- Rhubarb Custard Bars
- Rhubarb Pie
- Peach Cobbler Cupcakes
- Peach Dump Cake
- Chocolate Lava Cake
- Peach Sheet Cake
- Peach Coffee Cake
- Lemon Blueberry Cake
- Lemon Raspberry Cake
- Watermelon Cupcakes
- Tres Leches Cake
- Strawberry Icebox Cake
- Strawberry Oatmeal Bars
- Healthy Chocolate Chip Zucchini Bread
- Zucchini Carrot Muffins
- Strawberry Sheet Cake
- Peach Cobbler
- Peach Crisp With Fresh Peaches
- Cookies And Cream Cupcakes
- Fathers Day Cake
- Strawberry Rhubarb Pie With Frozen Fruit
- Mango Sago Dessert With Coconut Milk
- Beach Cake
- Gemini Cake
- Sonic Birthday Cake
- Ice Cream Sandwich Cake
- Strawberry Greek Yogurt Bites
- Banana Split Cake
- Chocolate Chip Pound Cake
- Fudgy Zucchini Brownies
- Mango Cookies
- Chocolate Banana Bread
- High Protein Cottage Cheese Brownies
- Banana Oatmeal Bars