One bite of these coconut dream bars, and you’ll understand exactly why this is the dessert you didn’t know you were missing—rich, creamy, chocolate-topped perfection that feels bakery-worthy but comes together right in your own kitchen.
Whether you need a make-ahead treat for gatherings, a crowd-pleasing holiday dessert, or simply something indulgent to satisfy a serious sweet craving, this recipe delivers with minimal stress and maximum reward.
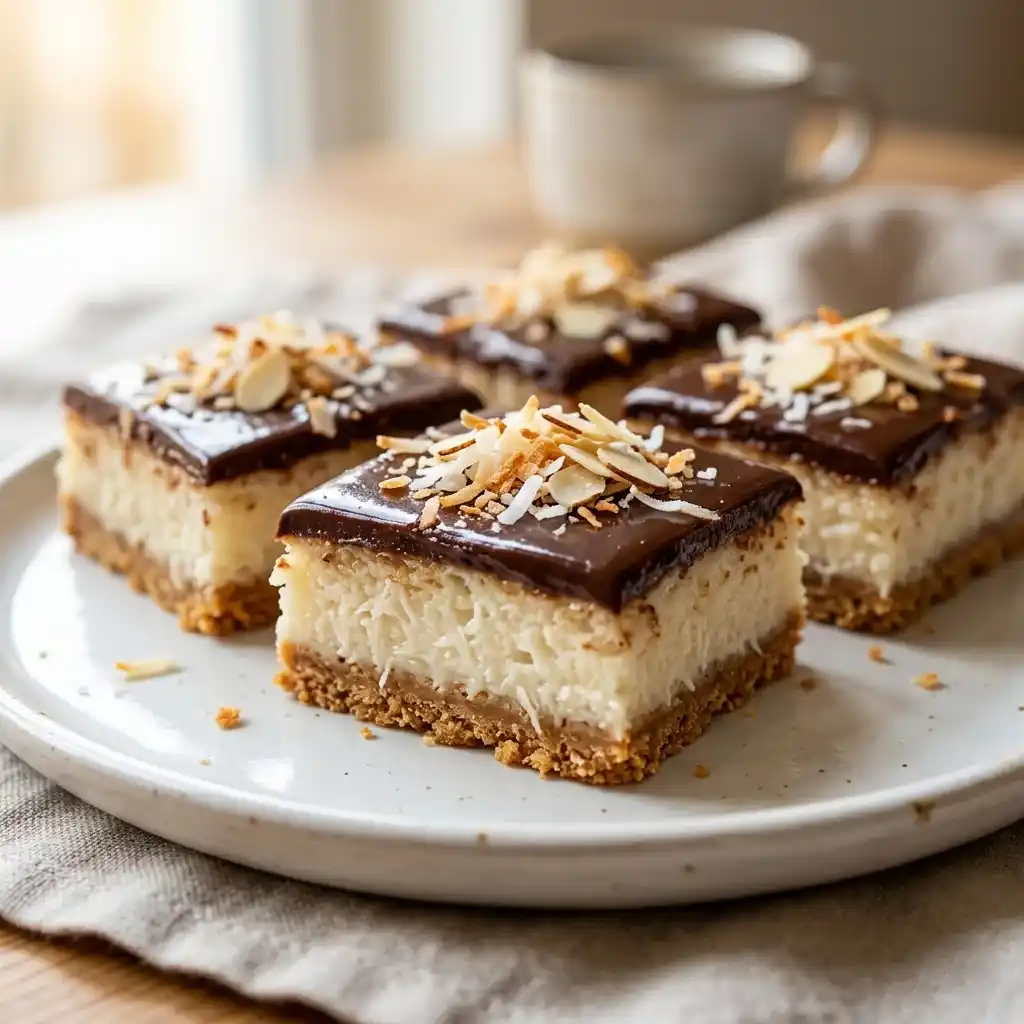
What makes these bars truly special is the irresistible combination of layers: a buttery, slightly crumbly biscuit base, a thick and luscious coconut filling, and a smooth, glossy chocolate topping that sets into the perfect finish.
Every bite melts into a balance of sweet coconut and deep chocolate flavor, with textures that shift from crisp to creamy to silky. The shredded coconut is the star here, giving the filling its signature chew and flavor, while the chocolate layer ties everything together with a rich, satisfying snap.
Imagine cutting into neat squares, the knife gliding through that soft center and firm topping, then taking a bite—first the gentle crunch of the base, followed by the creamy coconut layer that almost melts on your tongue, finished with a smooth chocolate coating that lingers just long enough to make you reach for another piece.
These bars are surprisingly simple and don’t require complicated techniques. With a little patience for chilling time and a few pantry staples, you’ll create a dessert that looks impressive and tastes unforgettable.
Serve them slightly chilled for clean slices, or let them sit at room temperature for a softer, creamier bite. Once you make these, don’t be surprised if they become your go-to signature dessert.
Table of Contents
Coconut Dream Bars Recipe
Ingredients
- 2 cups digestive biscuits, finely crushed
- 1/2 cup unsalted butter, melted
- 2 tablespoons granulated sugar
- 2 1/2 cups shredded coconut (desiccated, unsweetened or lightly sweetened)
- 1 cup sweetened condensed milk
- 1/2 cup heavy cream
- 1/4 cup granulated sugar
- 1 teaspoon vanilla extract
- 1 tablespoon cornstarch
- 2 tablespoons milk
- 1 1/2 cups semi-sweet chocolate chips
- 1/2 cup heavy cream
- 1 tablespoon butter
- 2 tablespoons toasted coconut flakes (for topping)
- 2 tablespoons sliced almonds (optional, for garnish)
Instructions
- Preheat your oven to 180°C (350°F) and line an 8×8-inch square baking pan with parchment paper, leaving some overhang for easy removal.
- In a mixing bowl, combine the crushed biscuits, melted butter, and sugar. Mix until the texture resembles wet sand and holds together when pressed.
- Transfer the mixture into the prepared pan and press it firmly into an even layer using the back of a spoon or the bottom of a glass.
- Bake the crust for 8–10 minutes until lightly golden. Remove from the oven and let it cool completely.
- In a saucepan over medium-low heat, combine the shredded coconut, sweetened condensed milk, heavy cream, and sugar. Stir continuously until everything is well combined and slightly thickened.
- In a small bowl, mix the cornstarch with 2 tablespoons of milk to create a smooth slurry. Add this to the coconut mixture and continue stirring.
- Cook the mixture for 4–6 minutes until it becomes thick, creamy, and holds its shape when stirred. Remove from heat and stir in the vanilla extract.
- Pour the coconut filling over the cooled crust and spread it evenly, pressing gently to create a smooth surface.
- Let the layer cool at room temperature for about 20 minutes, then transfer to the refrigerator for 30–40 minutes to firm up.
- To make the chocolate topping, heat the heavy cream in a small saucepan until just simmering (do not boil).
- Pour the hot cream over the chocolate chips in a bowl. Let it sit for 1–2 minutes, then stir until smooth and glossy. Add the butter and mix until fully incorporated.
- Pour the chocolate over the chilled coconut layer and spread evenly to the edges.
- Immediately sprinkle toasted coconut flakes and sliced almonds on top for texture and visual appeal.
- Refrigerate the bars for at least 2–3 hours, or until fully set.
- Once firm, lift the bars out using the parchment paper and cut into clean squares using a sharp knife.
What Are Coconut Dream Bars?
Coconut dream bars are a layered dessert made with three simple but indulgent parts: a buttery biscuit base, a rich and creamy coconut filling, and a smooth chocolate topping. When you slice into them, you get clean, bakery-style squares that taste as good as they look.
You can think of them as a no-fuss dessert that feels fancy without requiring complicated baking skills. The coconut layer is soft and slightly chewy, while the chocolate topping adds a silky finish that balances the sweetness. They’re perfect when you want something:
- Easy: simple ingredients and straightforward steps
- Make-ahead: they set beautifully in the fridge
- Crowd-pleasing: almost everyone loves coconut and chocolate together
Why Are My Coconut Dream Bars Not Setting Properly?
If your bars feel too soft or messy when slicing, it usually comes down to one of a few common issues. The good news is they’re easy to fix next time. Here are the main reasons this happens:
- Not enough chilling time: the layers need at least 2 to 3 hours in the fridge to fully firm up
- Coconut layer too loose: the filling must be cooked until thick before spreading
- Chocolate layer too warm: pouring very hot chocolate can soften the coconut layer underneath
- Incorrect measurements: too much liquid (like cream or condensed milk) can prevent proper setting
To fix it now, place the bars back in the fridge for another hour. For future batches, make sure the coconut mixture is thick and holds its shape before assembling.
Can I Use Fresh Coconut Instead Of Desiccated Coconut In Coconut Dream Bars?
Yes, you can use fresh coconut, but you need to prepare it properly to get the same texture and flavor. Fresh coconut contains more moisture, which can make the filling too wet if used directly. To make it work:
- Finely grate: use small shreds so the texture matches desiccated coconut
- Lightly dry: toast it gently in a pan for a few minutes to remove excess moisture
- Cool completely: never add warm coconut into the filling mixture
Using fresh coconut will give a slightly softer and more natural coconut flavor, but the bars will still hold together nicely if you follow these steps.
How Do You Get Clean Cuts On Coconut Dream Bars?
Getting those neat, sharp squares is easier than you think if you follow a few simple tricks. For perfect slices every time:
- Chill fully: make sure the bars are completely firm before cutting
- Use a sharp knife: a long, thin blade works best
- Wipe between cuts: clean the knife after every slice for smooth edges
- Warm the knife slightly: dip it in warm water and dry it before cutting
If you’re serving these for guests or an event, taking a few extra minutes for clean cuts makes a big difference in presentation.
Can I Make Coconut Dream Bars Ahead Of Time?
Yes, and this is actually one of the best things about this recipe. Coconut dream bars are ideal for making ahead because they need time to set anyway. Here’s how you can plan ahead:
- One day before: prepare the full recipe and store in the fridge overnight
- Same day: make them in the morning so they’re ready by evening
- For events: cut them into squares just before serving for the freshest look
Making them ahead not only saves time but also improves the texture, as the layers become more stable and easier to slice.
How Should You Store Coconut Dream Bars?
Proper storage keeps your bars fresh, firm, and delicious for days. Here’s the best way to store them:
- Refrigerator: place the bars in an airtight container and store for up to 5 days
- Layering: if stacking, place parchment paper between layers to prevent sticking
- Temperature: always keep them chilled because of the creamy filling
Avoid leaving them at room temperature for long periods, especially in warm weather, as the chocolate topping can soften.
Can You Freeze Coconut Dream Bars?
Yes, coconut dream bars freeze very well, which makes them perfect for long-term storage or prepping in advance. To freeze them properly:
- Cut first: slice into individual bars before freezing
- Wrap tightly: wrap each piece in plastic wrap or parchment
- Use a container: place wrapped bars in an airtight container or freezer bag
- Label and date: for best quality, use within 2 months
When you’re ready to enjoy them:
- Thaw in fridge: let them defrost overnight in the refrigerator
- Avoid microwaving: this can ruin the texture of the chocolate and filling
They will taste just as good after thawing if stored correctly.
Can I Use A Different Type Of Chocolate For Coconut Dream Bars?
Absolutely, you can customize the chocolate layer based on your taste. Here are some great options to try:
- Dark chocolate: gives a richer, less sweet flavor
- Milk chocolate: creates a sweeter, creamier topping
- White chocolate: adds a completely different, vanilla-like sweetness
Just keep in mind that softer chocolates (like milk or white) may set slightly softer than dark or semi-sweet chocolate.
What Pan Size Is Best For Coconut Dream Bars?
The ideal pan size for this recipe is an 8×8-inch square pan. This gives you the perfect thickness for all three layers. If you use a different pan:
- Larger pan: the bars will be thinner and may set faster
- Smaller pan: the layers will be thicker and may need more chilling time
Always line your pan with parchment paper so you can lift the bars out easily for clean cutting.
Are Coconut Dream Bars Very Sweet?
Yes, these bars are naturally on the sweeter side because of the condensed milk and chocolate layer, but the flavors are balanced. The sweetness is balanced by:
- Coconut texture: adds a natural, slightly nutty flavor
- Chocolate topping: especially if using semi-sweet or dark chocolate
- Biscuit base: adds a mild, buttery contrast
If you prefer less sweetness, you can reduce the added sugar slightly or use darker chocolate for a more balanced bite.
Can I Make Coconut Dream Bars Without Baking?
Yes, you can turn this into a completely no-bake dessert with one small change. Instead of baking the crust:
- Chill the base: press it into the pan and refrigerate for 30 minutes until firm
- Continue as usual: add the coconut and chocolate layers as instructed
The texture will be slightly softer, but still delicious and much quicker to prepare.

Coconut Dream Bars
Ingredients
Method
- Preheat your oven to 180°C (350°F) and line an 8×8-inch square baking pan with parchment paper, leaving some overhang for easy removal.
- In a mixing bowl, combine the crushed biscuits, melted butter, and sugar. Mix until the texture resembles wet sand and holds together when pressed.
- Transfer the mixture into the prepared pan and press it firmly into an even layer using the back of a spoon or the bottom of a glass.
- Bake the crust for 8–10 minutes until lightly golden. Remove from the oven and let it cool completely.
- In a saucepan over medium-low heat, combine the shredded coconut, sweetened condensed milk, heavy cream, and sugar. Stir continuously until everything is well combined and slightly thickened.
- In a small bowl, mix the cornstarch with 2 tablespoons of milk to create a smooth slurry. Add this to the coconut mixture and continue stirring.
- Cook the mixture for 4–6 minutes until it becomes thick, creamy, and holds its shape when stirred. Remove from heat and stir in the vanilla extract.
- Pour the coconut filling over the cooled crust and spread it evenly, pressing gently to create a smooth surface.
- Let the layer cool at room temperature for about 20 minutes, then transfer to the refrigerator for 30–40 minutes to firm up.
- To make the chocolate topping, heat the heavy cream in a small saucepan until just simmering (do not boil).
- Pour the hot cream over the chocolate chips in a bowl. Let it sit for 1–2 minutes, then stir until smooth and glossy. Add the butter and mix until fully incorporated.
- Pour the chocolate over the chilled coconut layer and spread evenly to the edges.
- Immediately sprinkle toasted coconut flakes and sliced almonds on top for texture and visual appeal.
- Refrigerate the bars for at least 2–3 hours, or until fully set.
- Once firm, lift the bars out using the parchment paper and cut into clean squares using a sharp knife.
You May Also Like To Check Out These Recipes
- No-Bake Chocolate Date Cookies
- Strawberry Shortcake
- Blueberry Dump Cake
- Atlantic Beach Pie
- Angel Food Cake
- Blue Velvet Cake
- Super Moist Chocolate Zucchini Cake
- Chocolate Tres Leches Cake
- Blueberry Cobbler
- Funfetti Cupcakes
- Chocolate Raspberry Cake
- Homemade Blueberry Crisp
- No Bake Blueberry Cheesecake
- Ice Cream Cone Cupcakes
- Pineapple Juice Cake
- Mango Cake With Whipped Cream
- Raspberry Cake
- Bakery-Style Lemon Bars
- Rhubarb Custard Bars
- Rhubarb Pie
- Peach Cobbler Cupcakes
- Peach Dump Cake
- Chocolate Lava Cake
- Peach Sheet Cake
- Peach Coffee Cake
- Lemon Blueberry Cake
- Lemon Raspberry Cake
- Watermelon Cupcakes
- Tres Leches Cake
- Strawberry Icebox Cake
- Strawberry Oatmeal Bars
- Healthy Chocolate Chip Zucchini Bread
- Zucchini Carrot Muffins
- Strawberry Sheet Cake
- Peach Cobbler
- Peach Crisp With Fresh Peaches
- Cookies And Cream Cupcakes
- Fathers Day Cake
- Strawberry Rhubarb Pie With Frozen Fruit
- Mango Sago Dessert With Coconut Milk
- Beach Cake
- Gemini Cake
- Sonic Birthday Cake
- Ice Cream Sandwich Cake
- Strawberry Greek Yogurt Bites
- Banana Split Cake
- Chocolate Chip Pound Cake
- Fudgy Zucchini Brownies
- Mango Cookies
- Chocolate Banana Bread
- High Protein Cottage Cheese Brownies
- Banana Oatmeal Bars
- Greek Yogurt Brownies
- Banana Greek Yogurt Smoothie
- Greek Yogurt Strawberry Kiwi Smoothie
- Strawberry Banana Greek Yogurt Smoothie
- Coffee Protein Smoothie
- Greek Yogurt Mango Smoothie
- Greek Yogurt pineapple Smoothie
- Greek Yogurt Banana Peanut Butter Smoothie
- Pumpkin Chia Seeds Pudding
- Chocolate Chia Seed Pudding With Berries
- Greek Yogurt Chia Seed Pudding
- Coffee Cake Muffins
- Nutella Banana Swirl Muffins
- No Bake Blackberry Lemonade Pie