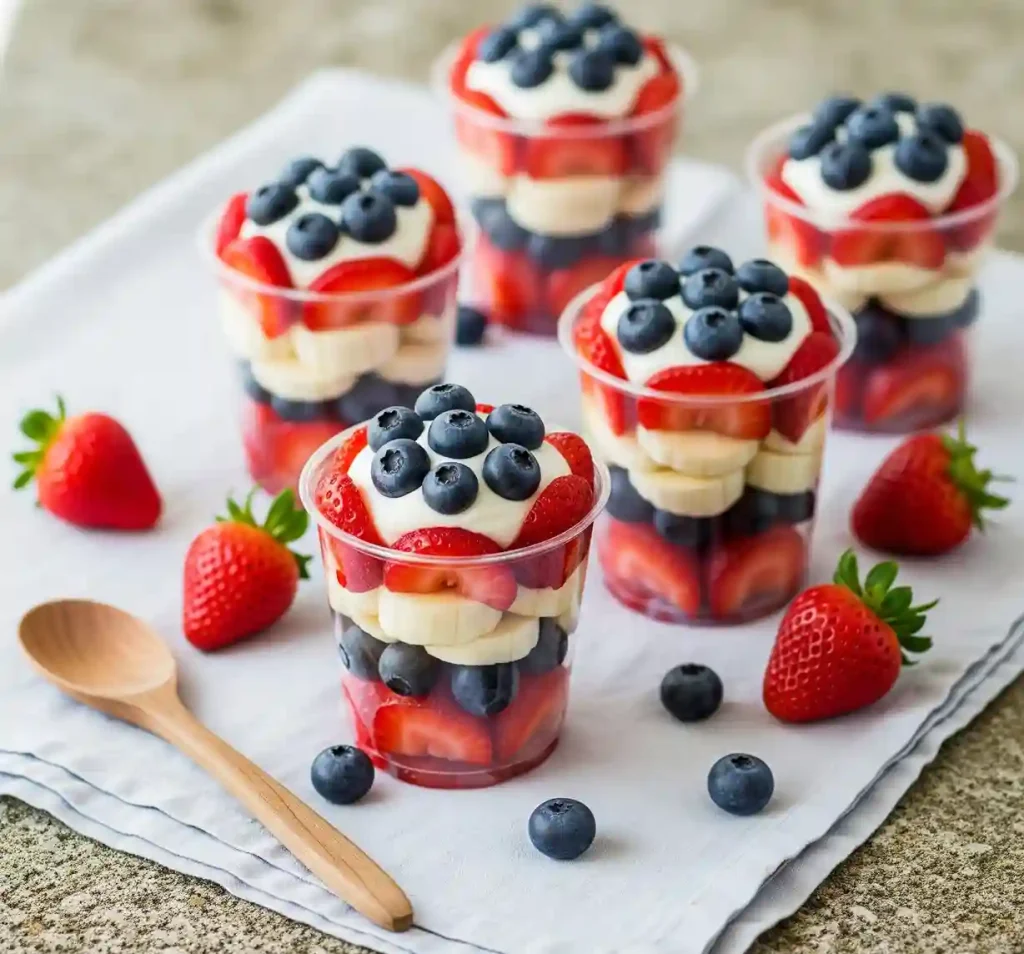
These 4th of July fruit cups are a fresh, fun way to serve something sweet without turning on the oven. They look festive on the table and take just a few minutes to layer and chill.
The colors stand out beautifully in clear cups, and every bite gives you a mix of creamy, juicy, and naturally sweet flavors.
You can prep everything ahead of time and assemble them just before your guests arrive, or make them the night before and keep them cold in the fridge. They’re easy to carry, simple to serve, and always disappear fast.
Bring them to a picnic, a cookout, or a backyard gathering and set them out right before dessert time. No one’s going to pass these up. They’re light, colorful, and just feel like summer.
Table of Contents
Red White And Blue Fruit Cups Recipe
Ingredients (Makes 6 Individual Cups)
- 2 cups fresh strawberries, hulled and sliced
- 2 cups fresh blueberries
- 3 ripe bananas, sliced into ¼-inch thick rounds
- 2 cups vanilla Greek yogurt (or any thick, plain yogurt)
- 2 teaspoons honey (optional, to sweeten yogurt if needed)
- 1 teaspoon vanilla extract
- 6 clear plastic cups (9 oz size recommended)
Instructions
- Combine the yogurt, honey, and vanilla extract in a small bowl. Mix until completely smooth and creamy. Set aside.
- Add about 4 to 5 slices of strawberries to the bottom of each cup, laying them flat to form the first layer.
- Spoon in enough blueberries to form the next layer, letting some settle between the strawberry slices.
- Arrange a layer of banana slices (about 4 to 5 rounds) over the blueberries, creating a full flat layer from edge to edge.
- Add two rounded spoonfuls of the yogurt mixture on top of the bananas. Gently spread it out with the back of the spoon to form a smooth, even layer.
- Add another layer of sliced strawberries, aligning them neatly for a clean look.
- Follow with a second layer of banana slices, using about the same amount as before.
- Spoon a final dollop of yogurt on top, allowing it to form a soft peak over the cup.
- Decorate the top by placing halved strawberries along the edge and adding a generous cluster of blueberries in the center, mimicking a flower-like pattern.
- Chill in the refrigerator for 30 to 60 minutes before serving to keep the texture firm and refreshing.
How Do You Keep The Banana Slices From Turning Brown?
Bananas can start to brown quickly after being sliced, but a few simple tricks can help keep them looking fresh and white in the cups.
- Use citrus juice: Lightly brush or toss the banana slices with lemon juice or orange juice. The natural acid slows down the browning process.
- Assemble closer to serving time: Bananas look their best when freshly cut, so if possible, slice and layer them within a few hours of serving.
- Cover and refrigerate: Once your fruit cups are assembled, cover each one tightly with plastic wrap and store them in the fridge. This reduces air exposure and helps the bananas stay fresher.
- Use firm, just-ripe bananas: Softer bananas brown more quickly. Choose bananas that are yellow without many brown spots.
Can You Make These Fruit Cups Ahead Of Time?
Yes, these fruit cups can definitely be made ahead, and doing so can save a lot of time, especially for parties or events.
- Assemble up to 1 day before: You can layer everything the night before. Just make sure to keep the cups tightly covered and stored in the fridge.
- Hold off on toppings: If you’re using extra fruit on top as decoration, wait until just before serving to add it for the freshest look.
- Keep cold until serving: Chill the cups well so the yogurt stays firm and the fruit stays crisp.
- Transport carefully: If you’re taking these to an event, pack them in a cooler bag or a shallow box lined with paper towels to keep them upright and steady.
How Long Can You Store Fruit Cups In The Fridge?
Fruit cups like these stay fresh for a short period, but they still give you a decent storage window if handled correctly.
- Store for up to 2 days: These are best eaten within 24–48 hours. The fruit starts to release juice and the bananas may change color after that.
- Always refrigerate: Keep them covered in the fridge until ready to serve. Don’t leave them out at room temperature for more than 30–45 minutes.
- Use airtight covers: If your cups came with lids, use them. Otherwise, wrap tightly with plastic wrap to keep air out and moisture in.
- Avoid freezing: Yogurt and fresh berries don’t freeze well in this form. The texture will change and become watery once thawed.
Can You Use Different Fruits In This Recipe?
Absolutely, you can switch up the fruits depending on what’s in season or what you like best. Just make sure to keep the red, white, and blue colors if you want the same patriotic look.
- Red fruits: Try raspberries, cherries (pitted and halved), or red grapes (halved).
- White layer: Sliced apples, pears, or even cubes of white melon can replace bananas. Just remember to treat apples or pears with lemon juice to prevent browning.
- Blue fruits: Blueberries are ideal, but you could also use black grapes or blackberries for a similar look.
What Type Of Yogurt Works Best For Layering?
The right yogurt helps your layers stay thick and neat. Choose one that’s creamy and holds its shape when spooned.
- Use thick Greek-style yogurt: This is the best choice because it’s smooth and doesn’t run or drip into the fruit layers.
- Plain or flavored is fine: Vanilla yogurt gives extra sweetness and flavor, but you can also use plain and add honey or maple syrup.
- Avoid thin yogurt: Regular yogurt or low-fat types can be too watery and may cause the layers to blend together or leak.
- Try plant-based options: Coconut yogurt, almond milk yogurt, or soy-based versions work great if you’re avoiding dairy.
How Can You Make These Look More Neat And Even?
Neat layers make these cups more eye-catching, and the look is part of what makes them stand out at a gathering.
- Use clear cups with straight sides: This helps the layers stay even and shows off the colors clearly.
- Spoon each layer gently: Don’t drop the fruit or yogurt in quickly. Spoon it in slowly and level it with the back of your spoon.
- Layer the fruit tightly: Press the fruit down gently as you go to prevent empty gaps. It keeps everything looking full and neat.
- Wipe the insides if needed: If yogurt gets on the inside of the cup while layering, clean it with a paper towel for a clean, polished look.