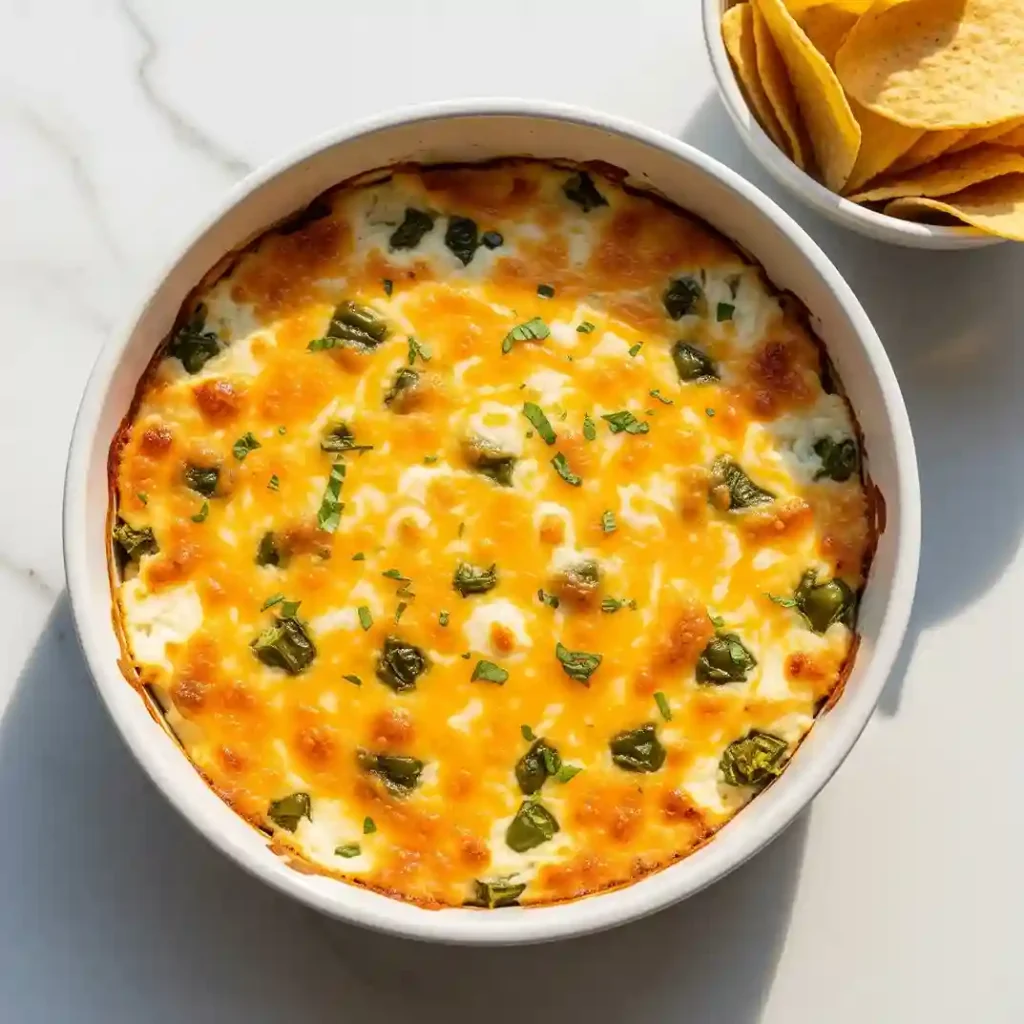
The first time I baked this hatch chile cream cheese dip, the entire kitchen filled with a rich, roasted aroma that felt warm and inviting long before it even hit the table.
Hatch chiles have a depth that regular peppers just don’t carry—they add a gentle heat, a smoky touch, and a flavor that makes the whole dish feel alive.
Blended with smooth cream cheese, a layer of sour cream, and a blanket of melted cheddar and Monterey Jack, it turns into a bubbling dip that draws everyone closer the moment it comes out of the oven.
What makes this recipe so satisfying is how each bite has balance—the cool creaminess, the melted cheese stretch, and the subtle spice of roasted Hatch chiles.
Served hot with crunchy tortilla chips or slices of toasted bread, it disappears faster than you expect.
It’s the kind of dish that doesn’t just sit quietly on the table—it steals attention, and before long, people are leaning in for seconds.
Table of Contents
Hatch Chile Cream Cheese Dip Recipe
Ingredients
- 8 oz cream cheese, softened to room temperature
- 1 cup sour cream
- 1 cup mayonnaise
- 1 ½ cups shredded Monterey Jack cheese
- 1 cup shredded cheddar cheese
- 1 cup roasted Hatch chiles, peeled, seeded, and chopped (mild or hot depending on your preference)
- 2 cloves garlic, finely minced
- ½ teaspoon onion powder
- ½ teaspoon smoked paprika
- ¼ teaspoon ground cumin
- ½ teaspoon salt (adjust to taste)
- ¼ teaspoon black pepper
- 2 tablespoons fresh cilantro, chopped (plus extra for garnish)
Instructions
- Preheat your oven to 375°F (190°C). Lightly grease a medium-sized baking dish.
- In a large mixing bowl, add the softened cream cheese, sour cream, and mayonnaise. Use a hand mixer or sturdy spatula to beat until smooth and well combined.
- Stir in the garlic, onion powder, smoked paprika, cumin, salt, and black pepper until evenly distributed.
- Add the chopped Hatch chiles, 1 cup Monterey Jack, ¾ cup cheddar, and cilantro to the cream cheese mixture. Mix thoroughly so every bite has chile and cheese.
- Transfer the mixture into the prepared baking dish, spreading it out evenly.
- Sprinkle the remaining Monterey Jack and cheddar cheese evenly on top.
- Bake uncovered for 25–30 minutes, or until the dip is hot, bubbly, and the cheese on top is golden brown.
- Remove from the oven, let it cool for 5 minutes, and garnish with a little extra chopped cilantro.
- Serve warm with tortilla chips, crusty bread, or vegetable sticks.
What Makes Hatch Chile Cream Cheese Dip Special?
Hatch chiles are not just peppers; they carry a flavor that stands apart from other varieties.
They are grown in Hatch Valley, New Mexico, and their unique soil and climate give them a taste that is smoky, earthy, and slightly sweet, with a mild to medium heat.
When baked into a creamy dip, they create a balance of spice and richness that keeps the dish from ever feeling too heavy.
This is why hatch chile cream cheese dip often becomes the highlight of any snack spread.
Can I Use Canned Hatch Chiles Instead Of Fresh Ones?
Yes, you can use canned Hatch chiles if fresh roasted ones are not available. The canned version saves time since the chiles are already roasted, peeled, and chopped.
However, fresh Hatch chiles offer a more vibrant flavor and aroma when roasted at home. If you choose canned, make sure to drain them well to avoid extra moisture in your dip.
What Cheese Works Best In Hatch Chile Cream Cheese Dip?
Cheese is the heart of this dip, so the choice matters. Different cheeses bring different qualities, and blending them makes the dip more flavorful.
- Monterey Jack: Melts smoothly and adds a creamy stretch.
- Cheddar Cheese: Brings a sharp, tangy flavor that balances the mild heat of Hatch chiles.
- Mozzarella: Can be added for extra gooeyness, though it has a lighter taste.
- Pepper Jack: Works well if you prefer more spice without changing the texture.
Using at least two types of cheese together makes the dip richer and more satisfying.
Can I Prepare Hatch Chile Cream Cheese Dip Ahead Of Time?
Yes, this dip can be made ahead for parties or gatherings. Simply prepare the mixture, spread it into the baking dish, and cover tightly with plastic wrap.
Refrigerate for up to 24 hours before baking. When you are ready to serve, bake it as directed, adding a couple of extra minutes to ensure it heats through completely.
This makes it easier to enjoy freshly baked dip without rushing at the last moment.
How Do I Store Hatch Chile Cream Cheese Dip?
Storage is simple and keeps the dip tasting good even after the day it’s made.
- Refrigerator: Once cooled, transfer leftovers to an airtight container or cover the baking dish tightly. Store in the refrigerator for up to 3 days.
- Reheating: Warm in the oven at 350°F (175°C) for 10–12 minutes until hot and bubbly again. For smaller portions, microwave in 30-second intervals, stirring in between.
- Freezer: Freezing is not recommended because cream cheese and sour cream tend to separate after thawing, which changes the texture of the dip.
What Can I Serve With Hatch Chile Cream Cheese Dip?
This dip is versatile and pairs well with a variety of sides. Having different serving options also makes it more appealing for guests with different preferences.
- Tortilla Chips: The classic choice for scooping.
- Crusty Bread Or Toasted Baguette Slices: Adds a hearty crunch.
- Vegetables: Carrot sticks, celery, cucumber slices, or bell pepper strips bring freshness to balance the richness.
- Crackers: Provide a quick and easy pairing.
Can I Make This Dip Spicier Or Milder?
Yes, adjusting the heat is simple and depends on your choice of Hatch chile and seasoning.
- Milder Option: Choose mild Hatch chiles and use less black pepper.
- Spicier Option: Go for hot Hatch chiles or add jalapeños, serrano peppers, or extra chili flakes to the mixture.
- Balanced Option: Mix mild and medium chiles to create a rounded heat level.
Is Hatch Chile Cream Cheese Dip Suitable For Parties?
Absolutely, this dip is a crowd-pleaser because it stays warm and gooey for a while after baking, making it easy to enjoy during gatherings.
You can also serve it straight from the baking dish or transfer it into a small slow cooker on the warm setting to keep it hot throughout the event.
This makes it a practical choice for parties, game days, or casual family nights.
You May Also Like To Check Out These Recipes
- Pineapple Chicken
- Pineapple Teriyaki Chicken
- Grilled Corn On The Cob With The Husks
- Mango Salsa
- Beef Hamburger
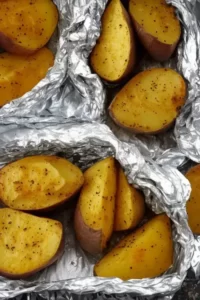
- Red Potato Salad
- Broccoli Slaw
- Grilled Chicken Kabobs
- Grilled Pizza
- Grilled Peaches
- Grilled Pineapple
- Grilled Eggplant
- Grilled Potatoes
- Grilled Sweet Potatoes
- Grilled Chicken Thighs
- Grilled Chicken Wings
- Grilled Chicken Breast
- Grilled Lamb Chops
- Avocado Egg Salad
- Mexican Street Corn
- Caprese Sandwich
- Slow Cooker Vegetarian Baked Beans
- Slow Cooker Chicken Tacos
- Pico De Gallo
- Caprese Skewers
- Grilled Corn Salsa
- Skillet Lemon Herb Chicken Breasts
- Mexican Street Corn Dip
- Chicken Broccoli Casserole
- Summer Squash Casserole
- Stuffed Zucchini
- Slow Cooker Beef Barbacoa
- Slow Cooker Chicken Tacos
- Chicken Macaroni Salad
- Fried Green Tomatoes
- Grilled Beef Steak
- Smash Burger Tacos
- Mexican Street Corn Pasta Salad
- Corn And Black Bean Salsa
- Cowboy Candy Candied Jalapeños
- Fiery & Flavorful Habanero Hot Sauce
- Homemade Habanero Jelly
- Habanero Mango Sauce
- Jalapeño Cheddar Bread
- Jalapeño Chicken
- Jalapeño Guacamole
- Jalapeno Popper Dip
- Jalapeño Popper Frittata
- Stuffed Jalapeno Poppers
- Hatch Chile Chicken Enchiladas
- Hatch Chile Corn Chowder