When I was a kid, October felt magical for one reason only: those glowing pumpkins that smiled at night. The sight of their carved faces on porches always made me stop and stare.
I wanted to bring that same feeling indoors, but in a way that could be shared, passed around, and enjoyed bite by bite. That’s how these Halloween pumpkin face cookies became my tradition.
They aren’t just cookies; they carry that same playful spirit of carving pumpkins, only with frosting instead of knives.
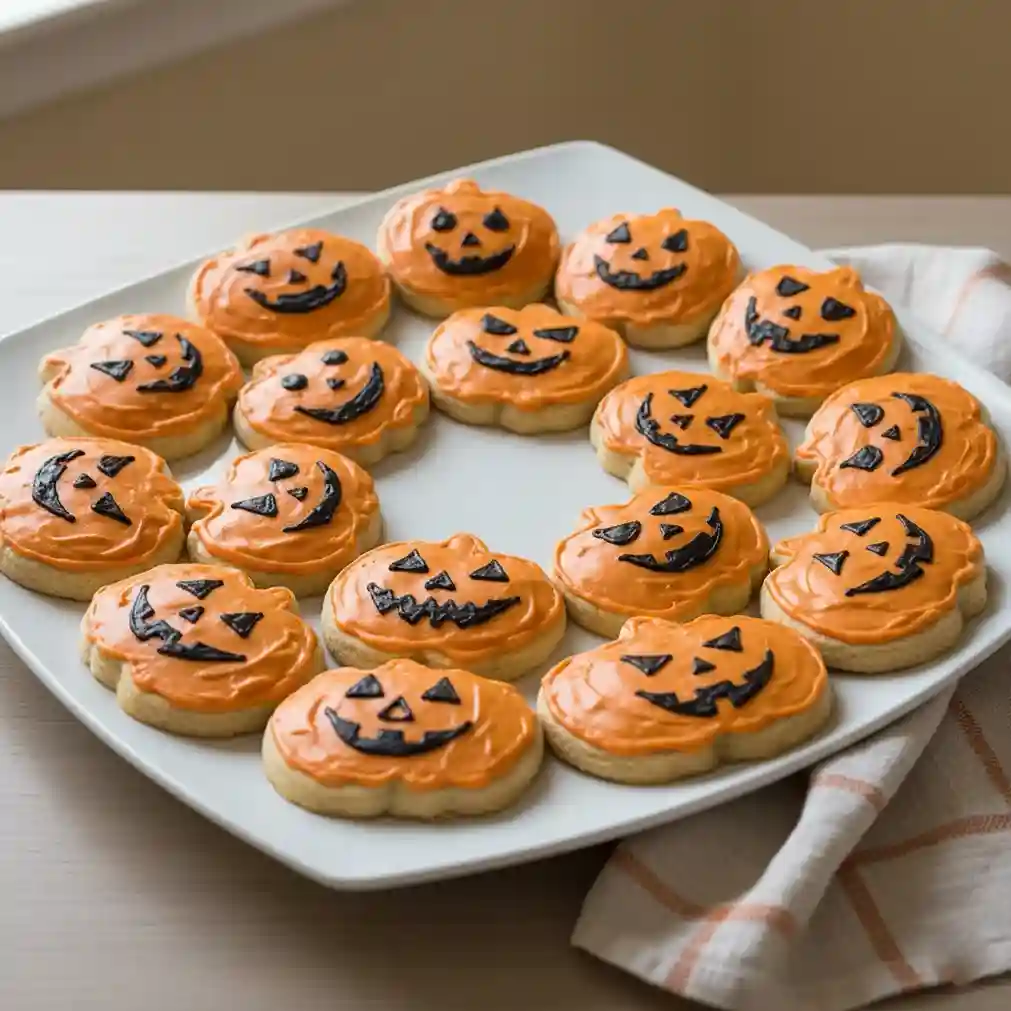
Each batch turns into a little parade of grinning faces—some cheerful, some mischievous, and a few a bit crooked, just like real jack-o’-lanterns.
I love that no two look the same, and yet together they make a tray that feels alive with character.
Every year, when I set a plate of these out, the reactions are always the same: wide eyes, laughter, and that pause before people decide which face to pick.
Kids love choosing the “funniest” one, while adults can’t resist going back for a second.
For me, it’s not just about baking—it’s about creating a centerpiece that instantly pulls everyone into the mood of the night.
Table of Contents
Halloween Pumpkin Face Cookies Recipe
Ingredients
- 2 ¾ cups all-purpose flour
- 1 teaspoon baking powder
- ½ teaspoon salt
- 1 cup unsalted butter, softened at room temperature
- 1 cup granulated sugar
- 1 large egg
- 2 teaspoons vanilla extract
- 1 tablespoon milk
For The Orange Icing
- 2 cups powdered sugar, sifted
- 2 to 3 tablespoons milk (adjust for consistency)
- 1 teaspoon vanilla extract
- Orange food coloring
For The Black Detailing
- 1 cup powdered sugar, sifted
- 1 ½ tablespoons cocoa powder
- 1 to 2 tablespoons milk
- Black food coloring
Instructions
- In a medium bowl, whisk together flour, baking powder, and salt. Set aside.
- In a large mixing bowl, cream butter and sugar with an electric mixer until light and fluffy, about 2 to 3 minutes.
- Beat in the egg, vanilla extract, and milk until fully combined.
- Gradually add the dry mixture into the wet mixture, mixing on low speed until the dough comes together.
- Divide the dough into two portions, flatten each into a disc, wrap tightly in plastic wrap, and refrigerate for at least 1 hour to firm up.
- Preheat oven to 350°F (175°C). Line baking sheets with parchment paper.
- Roll out the dough on a lightly floured surface to about ¼ inch thickness.
- Use a pumpkin-shaped cookie cutter to cut out cookies and place them onto the prepared baking sheets.
- Bake for 8 to 10 minutes, or until the edges are set but not browned. Let the cookies cool on the sheet for 5 minutes, then transfer to a wire rack to cool completely.
- To make the orange icing, whisk powdered sugar, milk, and vanilla extract until smooth. Add orange food coloring a little at a time until the desired shade is reached. Spread a generous layer over each cookie, letting it settle smoothly.
- To make the black detailing, whisk powdered sugar, cocoa powder, and milk until smooth. Add black food coloring for a deeper finish. Transfer to a piping bag fitted with a small round tip.
- Once the orange icing has slightly set, pipe on jack-o’-lantern faces with the black icing, creating triangles for eyes and different styles of mouths for variety.
- Allow cookies to sit at room temperature until the icing is fully set before serving or storing.
How Do I Make My Halloween Pumpkin Face Cookies Look Neat?
The decoration is what gives these cookies their fun and charm, so many people worry about messy icing. With a little patience, anyone can get neat, professional-looking results.
- Start With Completely Cooled Cookies: If the cookies are even slightly warm, the icing will melt and slide off.
- Use The Right Consistency: The orange icing should be thick enough to spread smoothly without dripping off the sides. If it feels too runny, add more powdered sugar.
- Work In Layers: Spread the orange base first, let it set for a few minutes, then add the black face details. This prevents colors from bleeding together.
- Practice On Paper First: If you’re nervous about piping the faces, practice drawing them on parchment paper before moving to the cookies.
Can I Make The Cookie Dough Ahead Of Time?
Yes, the dough is very flexible and can be prepared in advance. This saves time on busy days and also helps the cookies hold their shape better.
- Refrigeration: Wrap the dough tightly in plastic wrap and store in the fridge for up to 2 days.
- Freezing: Shape the dough into a disc, wrap it well, and freeze for up to 2 months. When ready to use, thaw overnight in the fridge before rolling and cutting.
How Do I Stop The Cookies From Spreading While Baking?
Nobody likes pumpkin faces that turn into blobs in the oven. A few small steps can keep the shapes sharp and defined.
- Chill The Dough Before Cutting: Cold dough holds shape better, so keep it in the fridge until you’re ready to roll and cut.
- Use Parchment Paper Or Silicone Mats: These help the dough bake evenly without too much spreading.
- Avoid Too Much Flour While Rolling: Extra flour can change the texture and cause spreading. Roll gently on a lightly floured surface.
Can I Use Other Colors For Decorating Halloween Cookies?
Orange and black are the classic pair, but there’s no rule saying you must stick to them.
- White And Black: Great for ghostly pumpkin faces.
- Green And Purple: Adds a fun, witchy vibe.
- Gold Or Silver Edible Dust: Can give a glowing, magical effect if you want something special.
How Long Do Halloween Pumpkin Face Cookies Stay Fresh?
The freshness depends on how you store them. Proper storage keeps them soft inside and crisp outside.
- At Room Temperature: Store in an airtight container for up to 4 days. Keep them in a cool, dry place away from sunlight.
- In The Fridge: They can last up to a week, but the icing may get slightly harder. Let them come back to room temperature before serving.
- In The Freezer: Undecorated cookies freeze best. Wrap each layer with parchment paper and store in a freezer-safe container for up to 2 months.
Can I Make These Halloween Cookies With Kids?
Yes, and it can be a fun family activity. Kids especially love decorating and making funny faces.
- Keep It Simple For Younger Kids: Let them spread the orange icing while you handle the detailed black designs.
- Use Squeeze Bottles Instead Of Piping Bags: Easier for small hands to control and less messy.
- Encourage Creativity: Not every face needs to be perfect. Crooked smiles or funny shapes only add to the charm.
What Is The Best Way To Store Decorated Cookies For A Party?
If you’re planning to make these cookies in advance for a party, storing them properly is very important.
- Single Layer Storage: Place them in a flat airtight container so the decorations don’t get smudged.
- Use Parchment Paper Between Layers: If you must stack them, separate each layer with parchment to protect the faces.
- Transport Carefully: If taking them to another place, keep the container flat and stable to avoid ruining the icing.
What To Serve Alongside Halloween Pumpkin Face Cookies?
Cookies on their own are fun, but pairing them with other treats makes the whole spread more exciting. These combinations work well for both kids and adults.
- Warm Drinks: Hot chocolate, apple cider, or spiced milk balance the sweetness of the cookies and make the flavors feel cozy.
- Savory Snacks: Mini sandwiches, popcorn, or cheese bites give guests a break from the sweetness.
- Fruit Platters: Sliced apples, grapes, or strawberries add freshness and color to the table.
- Other Halloween Treats: Cupcakes, brownies, or rice cereal bars decorated in Halloween style fit beautifully with these cookies on the same dessert table.
Troubleshooting Common Issues With Halloween Pumpkin Face Cookies
Sometimes baking doesn’t go as planned, but most problems have simple fixes.
- Cookies Turn Out Hard: This usually happens when they are baked for too long. Always remove them as soon as the edges are set, even if the centers look soft—they firm up as they cool.
- Icing Won’t Set: If the icing stays sticky, it likely has too much liquid. Add more powdered sugar and stir until it thickens. Then let the cookies sit at room temperature longer before stacking.
- Colors Bleed Together: Apply the orange base first and let it dry for 10–15 minutes before adding the black details. This drying time prevents smudging.
- Faces Look Uneven: Using the wrong piping tip or too much pressure can cause shaky lines. Practice on parchment paper before moving to the actual cookies, and keep your hand steady while piping.
- Cookies Lose Shape In The Oven: Warm dough spreads more. Always chill cut-out cookies on the baking sheet in the fridge for 10 minutes before baking.
- Icing Cracks After Drying: This happens if the layer is too thick. Spread evenly and avoid overloading the cookie with icing.
You May Also Like To Check Out These Recipes
- Halloween Veggie Tray
- 11 Halloween Sugar Cookies Decorating Ideas
- 150 Fun Halloween Food Ideas
- Halloween Deviled Eggs
- Halloween Brownies
- 75 Easy Halloween Treats
- 75 Best Halloween Appetizers
- Cheeseburger Soup
- Halloween Cheese Dip
- Halloween Oreos
- Halloween Rice Krispie Treats
- 60 Halloween Drinks For Kids And Adults
- Halloween Dirt Cake
- Halloween Taco Dip
- Halloween Pretzels
- Halloween Pasta Salad
- Pumpkin Whoopie Pies
- Halloween Spiderweb Pancakes
- 30 Amazing Halloween Side Dishes
- Halloween Witch Hat Cupcakes
- Halloween Melted Witch Cake
- Halloween Cookie Cake
- Halloween Chocolate Covered Strawberries
- Halloween Cake Pops
- 15 Spooky Halloween Pizza Ideas
- 50 Halloween Potluck Ideas
- 50 Halloween Finger Food Ideas
- 50 Halloween Dessert Ideas
- Halloween Snack Mix
- Jack-O’-Lantern Halloween Pumpkin Cake
- Fall And Halloween Coffee Bar: Setup And Decoration Ideas
- Halloween Charcuterie Board
- Spooky Halloween Fruit Platter
- Halloween Chocolate Bark
- Halloween Cookie Cake
- Halloween Dirt Cake
- Halloween Eyeball Pizza
- Halloween Cake Pops
- Halloween Chocolate Covered Strawberries
- Halloween Ghost Pizza
- Halloween Melted Witch Cake
- Halloween Mini Mummy Pizzas
- Best Orange Cake
- Halloween Brownies
- Halloween Vegan Spider Pizza Bites
- 7 Layer Halloween Taco Dip
- Halloween Brownies
- Halloween Ghost Cookies
- Halloween Cheese Dip
- Halloween Deviled Eggs
- Halloween Oreos
- Halloween Rice Krispie Treats
- Halloween Deviled Eggs
- 75 Easy Halloween Treats
- 75 Best Halloween Appetizers
- 150 Fun Halloween Food Ideas
- 60 Halloween Drinks For Kids And Adults
- Halloween Spiderweb Pancakes
- 30 Amazing Halloween Side Dishes
- Halloween Witch Hat Cupcakes
- 15 Spooky Halloween Pizza Ideas
- 50 Halloween Dessert Ideas
- Halloween Snack Mix
- Halloween Popcorn Balls
- 50 Halloween Potluck Ideas
- 50 Halloween Finger Food Ideas
- Fall And Halloween Coffee Bar: Setup And Decoration Ideas
- Halloween Dirt Cups
- Halloween Mummy Wrap Cookies
- Halloween Pasta Salad
- Halloween Frankenstein Cookies
- Halloween Popcorn Balls