I’ve always had a soft spot for Easter cookies, but the ones shaped like bunnies? Those feel extra special.
Maybe it’s because I grew up in a house where Easter meant two things: my mom’s obsession with pastel decorations and my grandmother’s perfectly decorated sugar cookies.
She had this giant tin of cookie cutters—stars, hearts, snowflakes—but every spring, the bunny made its annual appearance.
I remember sitting on a wobbly stool at the kitchen counter, watching her roll out the dough while I “helped” by sneaking bites of raw cookie scraps.
When the cookies came out of the oven, they smelled like vanilla and butter, and I knew the real fun was about to start. She’d hand me a piping bag filled with icing, give me a few quick tips, and let me go wild.
The result? Well, let’s just say my bunnies looked more like blobs with eyes. But hers? They were perfect—smooth, glossy icing, tiny pink noses, little piped whiskers. It was the kind of thing you almost felt bad eating. Almost.
Now that I make these cookies myself, I finally understand how she made them look so flawless. It’s not magic, just a really good sugar cookie recipe and the right icing technique.
So, if you’ve ever wanted to create cookies that actually look like the ones on Pinterest (instead of a baking fail meme), you’re in the right place.
These decorated Easter bunny cookies are crisp, buttery, and hold their shape perfectly for decorating. And don’t worry—I’ll walk you through every step so yours turn out just as cute as the ones in the photo.
Decorated Easter Bunny Cookies Recipe
Ingredients
For The Sugar Cookies
- 230g (1 cup) unsalted butter, softened
- 200g (1 cup) granulated sugar
- 1 large egg, room temperature
- 2 tsp vanilla extract
- 1/2 tsp almond extract (optional)
- 1/2 tsp salt
- 375g (3 cups) all-purpose flour
For The Royal Icing
- 500g (4 cups) powdered sugar, sifted
- 3 tbsp meringue powder
- 6 tbsp water (adjust as needed)
- 1/2 tsp vanilla extract
- Gel food coloring (blue, pink, yellow, green, white, black, and purple)
For Decorating
- Small round piping tips (#1, #2, #3 sizes)
- Piping bags
- Scribe tool or toothpick
- Bunny-shaped cookie cutter
- Small palette knife (optional)
Instructions
- Cream butter and sugar together in a large bowl using a hand or stand mixer on medium speed until light and fluffy (about 2 minutes).
- Add the egg, vanilla extract, and almond extract. Mix until well combined.
- In a separate bowl, whisk together flour and salt. Gradually add this to the wet ingredients, mixing on low speed just until the dough comes together.
- Divide the dough into two portions, shape each into a flat disc, and wrap in plastic wrap. Chill in the refrigerator for at least 1 hour.
- Preheat oven to 175°C (350°F) and line baking sheets with parchment paper.
- Roll out the chilled dough on a lightly floured surface to about 6mm (1/4 inch) thick.
- Use a bunny-shaped cookie cutter to cut out cookies and carefully transfer them to the prepared baking sheets.
- Bake for 10-12 minutes or until the edges are just slightly golden. Let cookies cool completely before decorating.
Royal Icing Preparation & Coloring
- In a large mixing bowl, combine sifted powdered sugar and meringue powder.
- Add water and vanilla extract, then mix on low speed using a hand mixer or stand mixer for 2 minutes. Increase speed to medium and beat for another 3 minutes until stiff peaks form.
- Divide the icing into separate bowls for each color:
- Blue, pink, and yellow for base bunny colors
- White for details (whiskers, small flowers, and highlights)
- Green for grass
- Black for eyes
- Purple for Easter eggs
- Thin each colored icing as needed:
- For flooding icing (base coat), add a few drops of water until it flows smoothly off a spoon in about 10 seconds.
- For piping details, keep the icing slightly thicker so it holds its shape.
Decorating The Cookies
- Outline each bunny cookie with the base color (blue, pink, or yellow) using a small round piping tip. Let the outline set for a few minutes.
- Flood the inside of the outlined cookie with the same color icing, using a scribe tool or toothpick to spread it evenly. Let dry completely before adding details.
- For the bunny faces, use black icing to pipe small dots for eyes and pink icing for the nose. Pipe whiskers using white icing.
- For the basket design, use yellow icing to create a textured pattern and add small purple Easter eggs inside.
- For grass decoration, use green icing and a piping tip with a fine opening to create grass strokes.
- Add small white and pink flowers using a tiny piping tip.
- Allow cookies to dry for several hours (preferably overnight) before stacking or packaging.

How Long Should You Chill The Dough?
Chilling the dough is essential for cut-out cookies to hold their shape and prevent spreading in the oven. It also makes the dough easier to handle.
- Minimum chilling time: 30 minutes in the refrigerator is enough to firm up the dough.
- Best results: 1 to 2 hours allows the flour to fully absorb the moisture, creating a better texture.
- Overnight chilling: Enhances the flavor and makes rolling even easier.
- Quick chill method: If short on time, place the dough in the freezer for 15 minutes.
Let the dough sit at room temperature for 5 to 10 minutes after chilling to soften slightly before rolling.
How Do You Get Royal Icing Smooth And Glossy?
Royal icing should dry with a smooth, shiny finish, not a dull or bumpy texture. Here’s how to achieve that perfect look:
- Use fresh ingredients: Meringue powder or egg whites should be fresh for the best consistency.
- Sift powdered sugar: This removes lumps and prevents grainy icing.
- Add a little corn syrup: Just a teaspoon per batch adds a glossy finish.
- Avoid overmixing: Too much air creates bubbles that make the icing look rough. Mix just until smooth.
- Let the icing settle: After mixing, cover it and let it sit for 5 to 10 minutes so air bubbles rise to the top.
When applied correctly, the icing should settle smoothly on the cookie without streaks or rough patches.
What’s The Right Icing Consistency For Outlining And Flooding?
Using the right consistency makes decorating much easier.
- Outlining consistency: Thick, toothpaste-like icing that holds its shape when piped. This creates a border that keeps the flooding icing in place.
- Flooding consistency: Thinner, honey-like icing that spreads smoothly. It should settle within 10 to 15 seconds after stirring.
- Detail work: Slightly thicker than flooding but still soft enough to pipe small decorations like whiskers or flowers.
If the icing is too thick, add a few drops of water. If it’s too thin, mix in a little more sifted powdered sugar.
How Do You Prevent Icing Colors From Bleeding?
Nothing is more frustrating than colors smudging together after hours of decorating. Here’s how to prevent it:
- Let each layer dry fully: Always wait for the base color to dry before adding details. This takes at least 8 to 12 hours for royal icing.
- Use gel food coloring: Liquid food dyes add extra moisture, making colors bleed. Gel-based colors are more concentrated and reduce this risk.
- Avoid too much humidity: Decorating in a humid environment causes colors to run. Use a fan or dehumidifier if needed.
- Don’t overfill the icing bag: Warm hands can cause icing to become too soft, leading to color bleeding.
How Long Should The Icing Dry Before Adding Details?
Patience is key when layering royal icing designs.
- Base layer drying time: 8 to 12 hours at room temperature before adding details.
- Smaller decorations: If piping dots, whiskers, or small accents, wait at least 1 hour before layering.
- Using a fan: Placing a fan on low speed near the cookies can speed up drying without affecting the icing’s texture.
What Tools Are Needed For Decorating Bunny Cookies?
A few simple tools make all the difference in decorating Easter cookies:
- Bunny-shaped cookie cutter: A metal cutter gives the cleanest edges.
- Piping bags: Disposable or reusable bags for precise icing work.
- Piping tips: A small round tip (like #1 or #2) is great for details like whiskers.
- Toothpicks or scribe tool: Helps smooth out icing and pop air bubbles.
- Gel food coloring: Vibrant pastel shades for a festive Easter look.
- Edible markers: Great for drawing guidelines before piping details.
How Do You Store Decorated Cookies To Keep Them Fresh?
Keeping your cookies fresh ensures they stay delicious and beautiful for days.
- Let icing dry completely: If stacked before drying, icing will smudge.
- Store in an airtight container: Place parchment paper between layers to prevent sticking.
- Room temperature storage: Keeps them fresh for up to a week.
- Refrigeration not recommended: Moisture from the fridge can soften the icing.
- Freezing option: If needed, freeze cookies in a single layer before stacking in a container. Thaw at room temperature before serving.
Can You Make These Easter Bunny Cookies Ahead Of Time?
Yes! Planning ahead makes holiday baking stress-free.
- Sugar cookie dough: Can be made up to 3 days in advance and stored in the fridge.
- Baked cookies: Stay fresh for up to a week in an airtight container.
- Decorated cookies: Best enjoyed within 5 to 7 days but can last longer if stored properly.
- Freezing option: Baked (undecorated) cookies can be frozen for up to 3 months. Thaw before decorating.
You May Also Like To Check Out These Posts
- 65 Best Easter Dinner Ideas For A Perfect Holiday Meal
- 40 Best Easter Treat Ideas For A Bright Spring Party
- 30 Best Easter Snack Ideas Kids And Adults Will Love
- 50 Easter Brunch Ideas For A Beautiful Holiday Spread
- 40 Easter Cake Ideas Too Tempting To Resist
- 20 Best Easter Cupcake Ideas You’ll Want To Bake Right Now
- Traditional Greek Easter Bread (Tsouréki)
- Easter Carrot Chocolate Covered Strawberries
- Easter Meat Pie
- Soft Hot Cross Buns
- Sicilian Easter Cookies With Eggs
- Italian Easter Anise Cookies
- Greek Lamb And Feta Burgers
- Air Fryer Lamb Chops
- Grilled Lamb Chops
- Pan-Seared Lamb Chops
- Bacon Cheeseburger Meatloaf
- Rack Of Lamb With Smashed Potatoes And Roasted Asparagus
- Sautéed Asparagus With Mushrooms
- Shepherd’s Pie
- Easter Egg Cookies
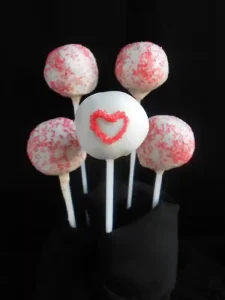
- Easter Cake Pops
- Chocolate Easter Cake With Vanilla Buttercream
- Easter Lamb Cake
- Easter Nest Cupcakes
- Easter Bunny Cake
- Easter Charcuterie Board
- Cheesy Potato Casserole
- Scalloped Potatoes
- Honey Glazed Carrots
- Honey Roasted Carrots
- Easter Cookie Cake