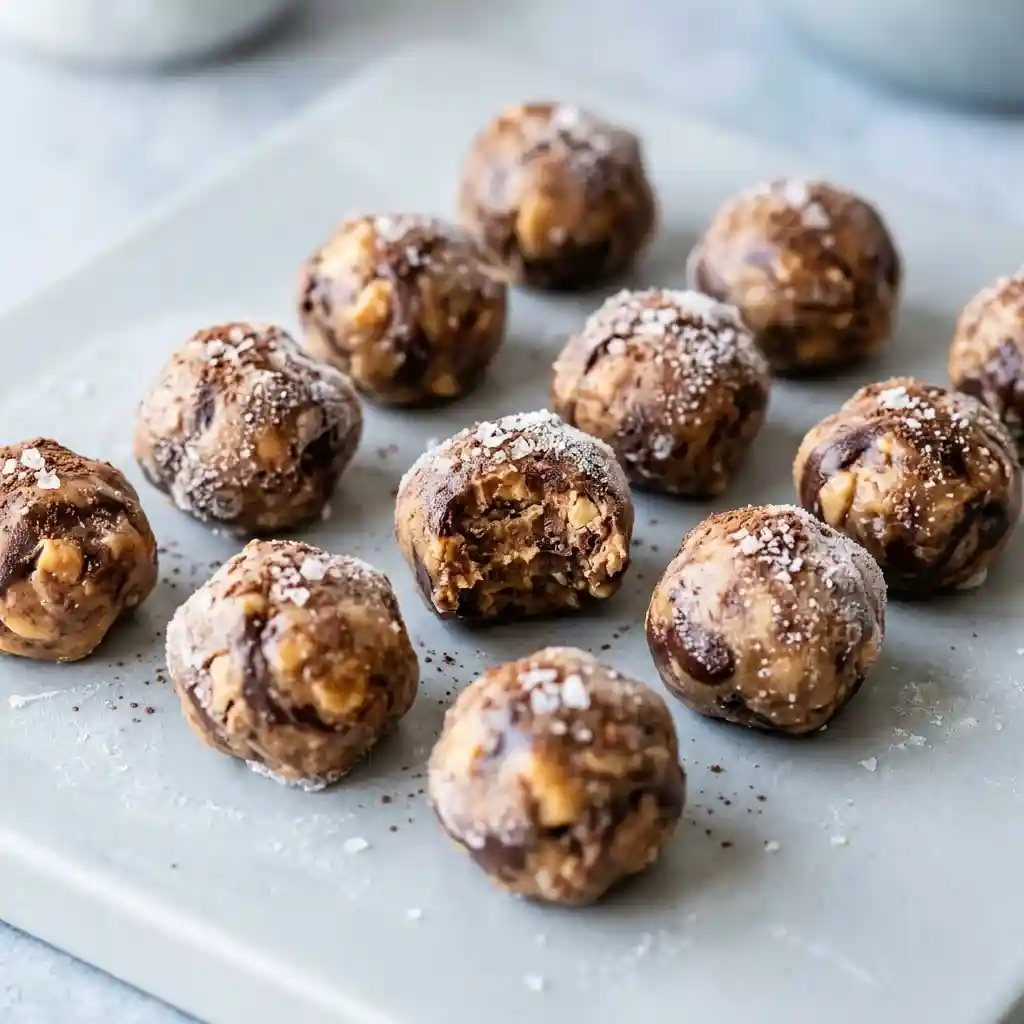
There’s a certain kind of craving that hits out of nowhere—the one that demands something sweet, chocolatey, and satisfying, but without the effort of baking or the guilt of overly indulgent desserts.
These frozen chocolate peanut butter bites answer that craving instantly.
They’re the kind of effortless, no-bake treat you keep in your freezer for late-night sweet tooth moments, quick energy boosts, or when you want to impress guests with something that tastes far more complex than it actually is.
What makes these bites truly special is how quickly they come together with just a handful of pantry staples, yet deliver a rich, indulgent experience.
Each bite is a perfect balance of deep chocolate flavor and nutty peanut butter richness, with a naturally sweet undertone that feels both comforting and satisfying.
The texture is where the magic happens—firm and chilled on the outside, then soft, slightly chewy, and melt-in-your-mouth creamy as you bite through.
The peanut butter and chocolate chips work as the stars here, creating little pockets of flavor that keep every bite interesting.
These come together in minutes with zero baking and minimal effort. You can customize them easily—add a pinch of sea salt, swap in crunchy peanut butter, or roll them slightly larger for a more indulgent treat.
Once you try them, you’ll realize this is the kind of recipe you’ll come back to again and again—the one that quietly becomes your signature freezer staple.
Table of Contents
Frozen Chocolate Peanut Butter Bites Recipe
Ingredients
- 1 cup natural creamy peanut butter
- 1/4 cup honey
- 1/4 cup pure maple syrup
- 1 teaspoon vanilla extract
- 1 1/2 cups rolled oats (finely pulsed for better texture)
- 1/4 cup unsweetened cocoa powder
- 1/3 cup mini chocolate chips
- 2 tablespoons coconut oil (melted)
- 1/4 teaspoon salt
- 1 tablespoon chia seeds (optional, for texture and binding)
- 1 tablespoon crushed peanuts (optional, for added crunch)
- 1 teaspoon flaky sea salt (for topping)
Instructions
- Start by pulsing the rolled oats in a food processor until they resemble a coarse flour. You want a slightly fine texture but not completely powdery—this helps create that soft yet structured bite.
- In a large mixing bowl, combine the peanut butter, honey, maple syrup, melted coconut oil, and vanilla extract. Stir until the mixture is smooth, glossy, and fully blended.
- Add the pulsed oats, cocoa powder, and salt into the wet mixture. Stir thoroughly until everything is evenly incorporated and forms a thick, scoopable dough.
- Fold in the mini chocolate chips, chia seeds, and crushed peanuts if using. Make sure they are evenly distributed throughout the mixture for consistent flavor in every bite.
- Scoop out small portions of the mixture (about 1 tablespoon each) and roll them between your palms to form smooth, compact balls. Place them on a parchment-lined tray.
- Once all the bites are formed, lightly sprinkle flaky sea salt over the top of each one. This enhances the chocolate flavor and adds a subtle contrast.
- Transfer the tray to the freezer and let the bites set for at least 1–2 hours, or until firm to the touch.
- Once frozen, transfer them to an airtight container and store in the freezer. Let them sit at room temperature for 2–3 minutes before eating for the best texture.
How Do You Store Frozen Chocolate Peanut Butter Bites?
You’ll want to store these bites properly so they keep their texture and flavor just right. Since they are meant to be enjoyed cold, storage is very simple and convenient. Here’s how you should store them:
- Freezer: keep the bites in an airtight container to prevent freezer burn and preserve freshness
- Layering: place parchment paper between layers so they don’t stick together
- Portioning: store in small batches so you can grab only what you need without thawing all of them
When stored correctly, the bites stay firm, flavorful, and ready whenever your craving hits.
How Long Do Frozen Chocolate Peanut Butter Bites Last In The Freezer?
These bites are perfect for long-term storage, which makes them ideal for meal prep or make-ahead snacks. Here’s what you can expect:
- Optimal freshness: up to 2 to 3 weeks for best taste and texture
- Extended storage: they can last up to 1 month, but the flavor may slightly fade
- Texture check: if they become too hard or dry, let them sit at room temperature briefly before eating
Keeping them sealed tightly is the key to maintaining that soft, chewy center.
Can You Store Chocolate Peanut Butter Bites In The Refrigerator Instead?
Yes, you can store them in the refrigerator if you prefer a softer, less frozen texture. This is a great option if you don’t like very firm bites. Here’s how fridge storage changes things:
- Texture: softer and more fudge-like instead of firm and frozen
- Shelf life: lasts about 5 to 7 days in an airtight container
- Convenience: ready to eat instantly without waiting
If your kitchen is warm, refrigeration also helps them hold their shape better.
Do You Need To Thaw Frozen Chocolate Peanut Butter Bites Before Eating?
You don’t need to fully thaw them, but letting them sit for a minute or two makes a big difference in texture. Here’s what to do:
- Quick rest: let the bites sit at room temperature for 2 to 3 minutes
- Texture result: slightly softened outside with a creamy, chewy center
- Straight from freezer: still safe to eat, just firmer and more solid
This small step brings out the best flavor and mouthfeel.
Why Are My Frozen Chocolate Peanut Butter Bites Too Hard?
If your bites turn out too hard, it usually comes down to ingredient balance or freezer time. Here are the most common reasons and fixes:
- Too much freezing time: let them sit out briefly before eating
- Not enough fat: add a bit more peanut butter or coconut oil next time
- Too many dry ingredients: reduce oats slightly to keep them softer
The goal is a firm outside with a soft, chewy inside—not rock solid.
Why Are My Chocolate Peanut Butter Bites Not Holding Together?
If your mixture is crumbly or falling apart, it just needs better binding. Here’s how to fix it:
- Add moisture: mix in a little more peanut butter or honey
- Mix thoroughly: ensure all ingredients are evenly combined
- Chill the dough: refrigerate the mixture for 10 to 15 minutes before rolling
The dough should feel slightly sticky but easy to shape.
Can You Make Frozen Chocolate Peanut Butter Bites Without Oats?
Yes, you can easily make them without oats if you want a smoother or lower-carb version. Here are some alternatives you can use:
- Almond flour: creates a soft, slightly nutty texture
- Crushed nuts: adds crunch and richness
- Coconut flour: absorbs moisture well but use less of it
Each option changes the texture slightly, but they all work well.
Can You Customize Frozen Chocolate Peanut Butter Bites?
Absolutely, this is one of the most flexible recipes you can make. You can adjust flavors and textures based on what you love. Here are some easy ways to customize:
- Sweetness level: adjust honey or maple syrup to taste
- Add-ins: mix in chopped nuts, seeds, or dried fruit
- Coating: roll in cocoa powder, shredded coconut, or crushed peanuts
- Flavor boost: add cinnamon or a pinch of espresso powder
This makes the recipe feel new every time you make it.
Are Frozen Chocolate Peanut Butter Bites Healthy?
These bites are a better-for-you treat compared to many desserts, but they should still be enjoyed in moderation. Here’s why they’re a good option:
- Natural ingredients: made with simple pantry staples
- Healthy fats: peanut butter provides satisfying richness
- Portion control: small size helps you avoid overeating
They strike a nice balance between indulgent and wholesome.
Can You Double Or Meal Prep Frozen Chocolate Peanut Butter Bites?
Yes, this recipe is perfect for doubling or even tripling. It’s one of the easiest snacks to prepare in bulk. Here’s how to make meal prep simple:
- Batch making: mix a larger quantity and roll all at once
- Storage: freeze in portions so you can grab and go
- Consistency: keep ingredient ratios the same for best results
Once you have a batch ready, you’ll always have a quick snack or dessert on hand.

Chocolate Frozen Peanut Butter Bites
Ingredients
Method
- Start by pulsing the rolled oats in a food processor until they resemble a coarse flour. You want a slightly fine texture but not completely powdery—this helps create that soft yet structured bite.
- In a large mixing bowl, combine the peanut butter, honey, maple syrup, melted coconut oil, and vanilla extract. Stir until the mixture is smooth, glossy, and fully blended.
- Add the pulsed oats, cocoa powder, and salt into the wet mixture. Stir thoroughly until everything is evenly incorporated and forms a thick, scoopable dough.
- Fold in the mini chocolate chips, chia seeds, and crushed peanuts if using. Make sure they are evenly distributed throughout the mixture for consistent flavor in every bite.
- Scoop out small portions of the mixture (about 1 tablespoon each) and roll them between your palms to form smooth, compact balls. Place them on a parchment-lined tray.
- Once all the bites are formed, lightly sprinkle flaky sea salt over the top of each one. This enhances the chocolate flavor and adds a subtle contrast.
- Transfer the tray to the freezer and let the bites set for at least 1–2 hours, or until firm to the touch.
- Once frozen, transfer them to an airtight container and store in the freezer. Let them sit at room temperature for 2–3 minutes before eating for the best texture.
You May Also Like To Check Out These Recipes
- No-Bake Chocolate Date Cookies
- Strawberry Shortcake
- Blueberry Dump Cake
- Atlantic Beach Pie
- Angel Food Cake
- Blue Velvet Cake
- Super Moist Chocolate Zucchini Cake
- Chocolate Tres Leches Cake
- Blueberry Cobbler
- Funfetti Cupcakes
- Chocolate Raspberry Cake
- Homemade Blueberry Crisp
- No Bake Blueberry Cheesecake
- Ice Cream Cone Cupcakes
- Pineapple Juice Cake
- Mango Cake With Whipped Cream
- Raspberry Cake
- Bakery-Style Lemon Bars
- Rhubarb Custard Bars
- Rhubarb Pie
- Peach Cobbler Cupcakes
- Peach Dump Cake
- Chocolate Lava Cake
- Peach Sheet Cake
- Peach Coffee Cake
- Lemon Blueberry Cake
- Lemon Raspberry Cake
- Watermelon Cupcakes
- Tres Leches Cake
- Strawberry Icebox Cake
- Strawberry Oatmeal Bars
- Healthy Chocolate Chip Zucchini Bread
- Zucchini Carrot Muffins
- Strawberry Sheet Cake
- Peach Cobbler
- Peach Crisp With Fresh Peaches
- Cookies And Cream Cupcakes
- Fathers Day Cake
- Strawberry Rhubarb Pie With Frozen Fruit
- Mango Sago Dessert With Coconut Milk
- Beach Cake
- Gemini Cake
- Sonic Birthday Cake
- Ice Cream Sandwich Cake
- Strawberry Greek Yogurt Bites
- Banana Split Cake
- Chocolate Chip Pound Cake
- Fudgy Zucchini Brownies
- Mango Cookies
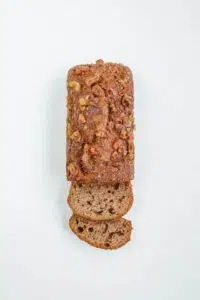
- Chocolate Banana Bread
- High Protein Cottage Cheese Brownies
- Banana Oatmeal Bars
- Greek Yogurt Brownies
- Banana Greek Yogurt Smoothie
- Greek Yogurt Strawberry Kiwi Smoothie
- Strawberry Banana Greek Yogurt Smoothie
- Coffee Protein Smoothie
- Greek Yogurt Mango Smoothie
- Greek Yogurt pineapple Smoothie
- Greek Yogurt Banana Peanut Butter Smoothie
- Pumpkin Chia Seeds Pudding
- Chocolate Chia Seed Pudding With Berries
- Greek Yogurt Chia Seed Pudding
- Coffee Cake Muffins
- Protein Cottage Cheese Cookie Dough
- Frozen Peanut Butter Snack Bites
- High Protein Strawberry Cheesecake Bowl
- Chewy Banana Bread Cookies